New Dropdown Menus
A fun way for students to create Mad Libs, Track Project Progress, Choose Your Own Adventure Stories, and more. Also perfect for Rubrics. INSERT–>Dropdown There are also some new building block templates that make it easy to get started with drop-down menus. (animated GIF below from Brian Buffington, who offers a weekly edtech newsletter) (You might also want to check out Richard Byrne’s post on this and 4 other new Google doc features)
If you are retiring from teaching, changing roles, or changing grades, you might be wondering how you can best share some of your teaching materials with your principal or colleagues from your department or team. This post will offer some suggestions. If you are retiring or leaving the district, a direct email will be sent to you regarding how to return district technology at the end of the school year. Please be on the look out for that email if it applies to you.
Share Google Content with Colleagues
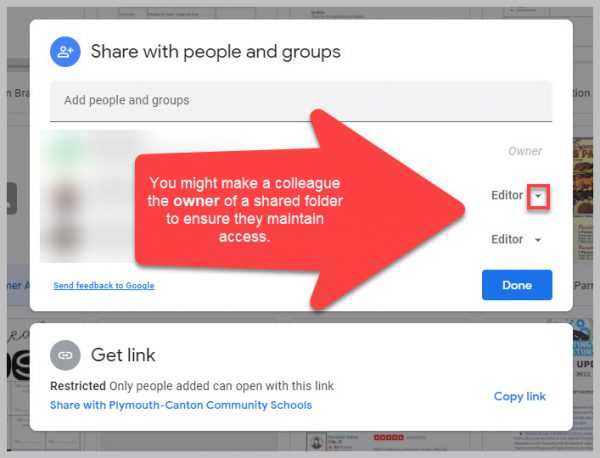
You will want to make sure that a colleague you want to share files with is made the owner of a document or folder. You can change this if you are the current owner.
This option is best if you are leaving the district. Change this setting after you have used Google Transfer or Download.
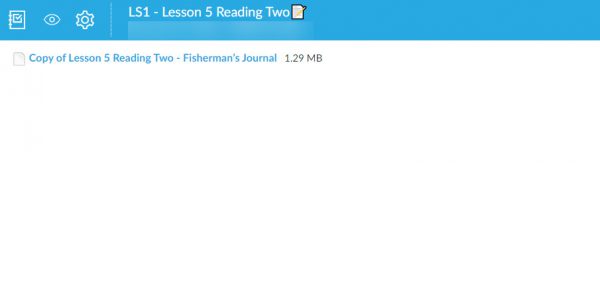
If you are not leaving the district and want your files shared, but not altered, you might download a folder and then re-upload it to your Drive naming it “3rd Grade Originals.” This will allow you to maintain a copy of your versions of the documents.
Please be mindful about checking folders before you share them to ensure confidential, student information is not shared.
Share Canvas Course Content
You are able to export your Canvas course as an IMSCC ZIP file that can be uploaded into many Learning Management Systems (if you are leaving the district) or shared via a thumb drive.
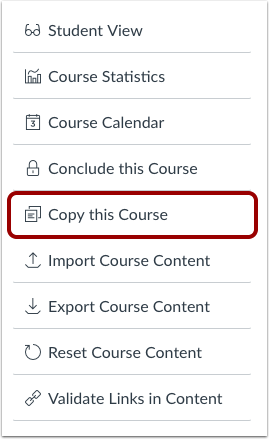
If you want to share your course with another teacher, you can make a copy of your course (found in Settings). When you make the copy you can select the specific content you are willing to share, give it a name (i.e. Bullock Shared US History) and then add your colleague(s) as a teacher in the course. Finally, to make your course more widely available to others at P-CCS you can export your course to Canvas Commons, when you export you can choose to make it viewable to the public or only to P-CCS teachers.
Please submit a tech ticket if you have additional questions about sharing content.
UPDATE: Canvas and Google have worked together to RESOLVE the issue described in last month’s blog post shown below. Thank you for your patience.
————–
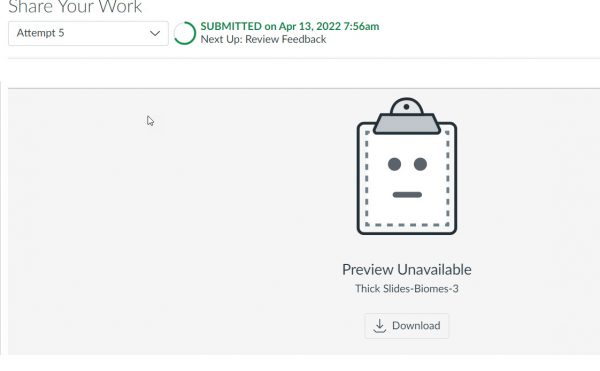
Some teachers are experiencing Canvas assignment submissions that are subsequently inaccessible to them. This has been occurring when a Canvas assignment is created and students load a file from Google Drive. When the teachers open Speedgrader, instead of seeing a preview of the document they see a link to an unknown file type that they are unable to download or view.
Error teachers experience with Google Drive submissions
Students will have a clue that submission didn’t come through correctly when they select and attach an item from Google Drive they will see this:
Students will see this when their attachment is unsuccessful. They should follow the directions linked below to upload the file as a PDF.
This is a Google LTI issue and we are currently working on a resolution. There are several potential workarounds:
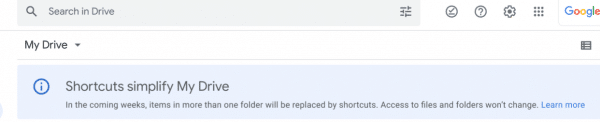
FYI, starting on June 27, 2022 and in the weeks thereafter, Google will be replacing multiple-location Drive files with shortcuts. Any impacted users in our domain will start seeing an in-product notification banner about two weeks before the replacement starts. The banner will notify them about the change and will point them to a support article with more info. The migration will take place automatically—no action will be required by users.
Google’s change is meant to simplify folder and file structures and helps reduce confusion around files with multiple parent folder locations.
When a file is replaced with a shortcut:
One location is preserved for files or folders currently contained in multiple locations. All other instances of the item will be replaced with a shortcut.
Ownership and sharing permissions for files and folders are preserved.
If you have not heard of Matt Miller, author of Ditch that Textbook and other titles, it is your lucky day! His website, books, and podcast are full of great teacher tips. Recently, he has promoted an EfficienTEACH series to help you save time and have a big impact on student learning. Check out some of his fantastic resources below, click the picture to access the links.
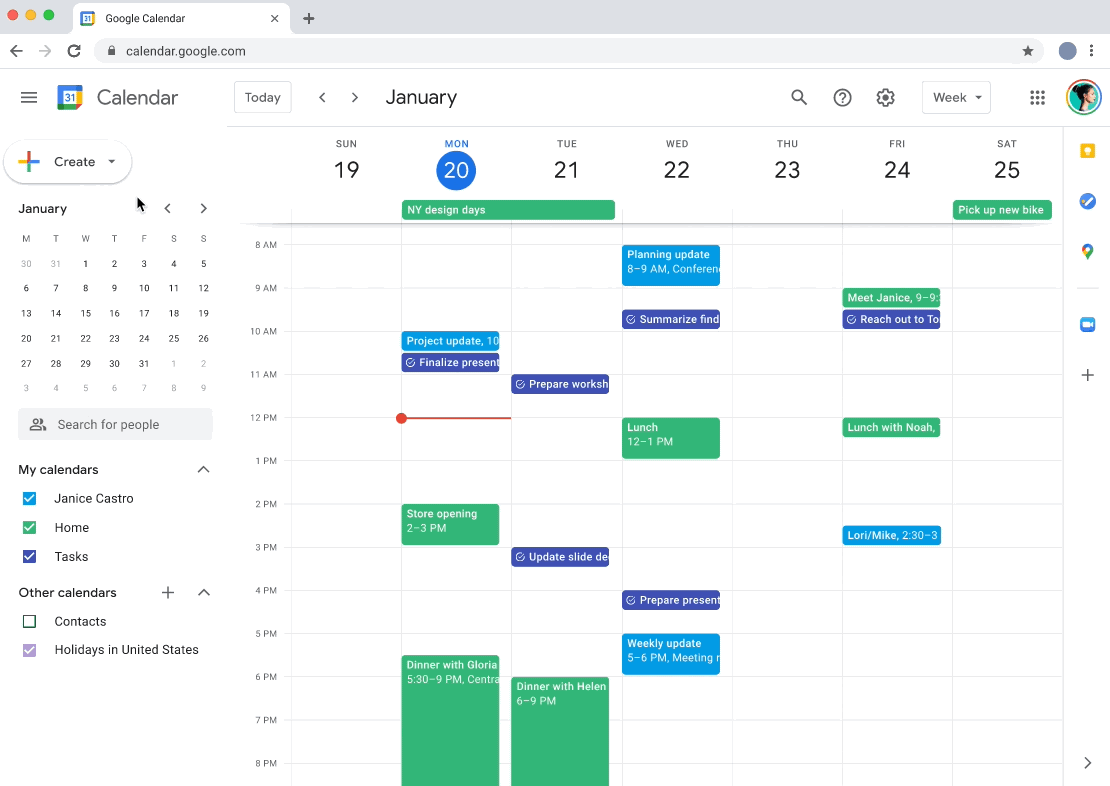
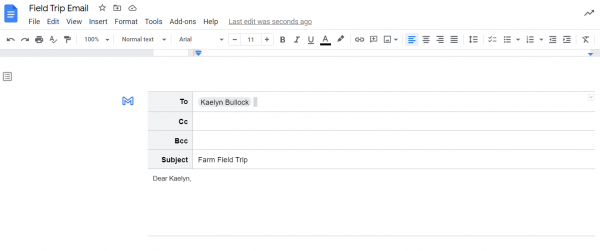
Ever find yourself writing emails and thinking that you should really save it to re-use later? Google Docs now makes it easier to draft an email in Docs and send it with just a few more clicks.
Entering @email in docs.google.com will load a template complete with To, Cc, Bcc, and Subject lines. It can also be accessed via Insert > Building Blocks > Email draft.
You can access your contacts and enter them directly in the correct fields. Then you can draft your email. Because you are in Docs you can share it with your grade-level team or co-teacher for feedback and suggestions.
When you are ready to send, click on the Gmail icon and it will automatically populate the Gmail message with what you entered in Docs. Then congratulate yourself because that yearly email or other frequent communication is saved in Drive to save you time in the future.
This feature was previously mentioned along with some other exciting updates in this blog post.
Here are some highlights from the latest newsletter for your consideration.
Educator Resources
Celebrate Earth Day with Applied Digital Skills
Earth Day is on April 22nd, and it’s a great opportunity to teach your students about our planet in a variety of ways. Our ‘Earth Day Collection’ offers lessons to learn about the environment and raise awareness on issues that are meaningful, all while learning digital skills.
New Math Lessons from Applied Digital Skills
Looking for engaging lessons to celebrate Math Awareness Month? Our new collection of math lessons uses project-based learning to explore math topics such as probability, percentages, and fractions. These lessons teach students the basics of organizing data sets and using formulas in Google Sheets.
22 Digital Days Challenge for Educators
We have a fun bite-sized challenge for educators – #22DigitalDays – 22 tasks to engage teachers & students in digital dabbling, which can be adapted as necessary. Get started and share these cool tips, tricks and resources to use in the classroom and beyond.
Computer Science Educator’s Guide
To help teachers gain skills and confidence in Computer Science, we are partnering with European Schoolnet to offer a free online course: “Computer Science: Educator’s Guide” starting on April 25th. Sign up now!
ARRAY 101 Educator Forum Livestream
Filmmaker Ava DuVernay’s ARRAY 101 launched learning companions for films Selma, When They See Us, Colin in Black and White, and Sankofa. Join this livestream on April 19th at 4:30pm PST and learn how to foster understanding beyond the screen and inspire dialogue in your classroom.
Arts & Culture: Manga Out of the Box
Discover manga culture; the historical background, how they are drawn, story telling, key figures, and the social impact. With videos, stories, images, streetview, and a machine learning tool that makes your drawings manga style, there is lots to discover and inspire.
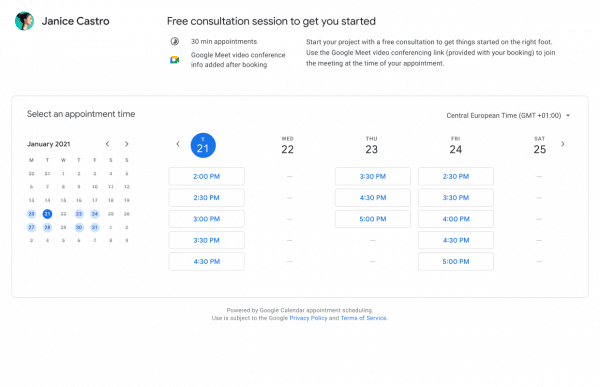
In addition to appointment slots in Google Calendar, in mid-April Google will be introducing appointment scheduling for users to share their availability via a booking page, which can be used by those with OR without a district (or any) Google account. For those using calendly, youcanbook.me, and similar services, this upcoming feature addition might suggest you can switch at some point instead to using your Google calendar with its native integrations.
Why you’d use it
The existing appointment slot feature in Google Calendar is helpful for internal use cases, specifically if you don’t know who needs to meet with you, but you want to make yourself available for others with district Google accounts. For example, counselors can invite their students to office hours each week.
The new appointment scheduling feature is suited for external use cases, allowing external users, including those without a Google account, to schedule meetings. Additionally, with automatic conflict detection with existing Calendar events, this feature helps reduce time spent finding and rescheduling appointments.
You can now embed linked response charts from Google Forms into a Google Doc, Google Slides presentation, or a Google Drawing. When new form responses are received, anyone with the proper permissions can refresh an embedded chart by simply clicking the “Update” button. This eliminates the need to re-copy the chart from the form.
This feature is useful for sharing real-time responses to polls or surveys and for incorporating Forms responses data into presentations or reports.
We’re making it easy to collaborate on an email draft in Docs with the new email draft template. You can mention people in the recipient fields using the @ menu without having to remember their email addresses, and collaborate on the message body using comments and suggestions. When ready to send, simply click the button that is shown alongside an email draft. A Gmail compose window will pop up, with email fields (subject, to, cc, bcc, and body) automatically populated based on the email draft in the document.
There is no end user setting for this feature. To insert an email template, go to Insert > Building Blocks > Email draft
In addition to seeing when someone is out of office, you can now see additional Google Calendar statuses like “In a meeting” or “In focus time” in Google Chat.
Why you’d use it
We hope by surfacing these additional statuses, this will make it easier for your colleagues to identify appropriate times to message you.
Here are some highlights from the latest newsletter for your consideration.
Educator Resources
Celebrate Women’s History Month with Applied Digital Skills
Looking to celebrate Women’s History Month with your class? Our new lesson ‘Celebrate Your Accomplishments with Google Docs’ has students explore the accomplishments of a woman they admire and practice talking about those achievements with a partner. [Contents of both lessons are in the Creative Commons and can be reworked to put up in your Canvas]
Women of Color in Tech Scholarship
We’d like to invite you to apply to the new ‘Women of Color in Tech’ scholarship, providing twenty $10K scholarships to women studying computer science and related fields. Please encourage high school seniors or undergraduate Black, Latina, and/or Native women currently pursuing or who have completed computing related degrees to apply.
Extra Credit
Register for the Teach with Chrome Series
Learn about the latest in Chrome devices and Chrome OS with more than ten 30-minute sessions featuring Google experts and partners running demo-based trainings. If you can’t watch live, all sessions will be available on demand after the livestream finishes each day.
Arts & Culture: Women in Culture
To celebrate Women’s History Month, help honor women in engineering, chemistry, natural history, space, and medicine. Discover the lives of the women in STEM and politics, art, and sports through stories, lesson plans, videos, and virtual tours.
Arts & Culture: Mali Magic
Discover the four Ms of Mali; Manuscripts, Music, Monuments and Modern Art. Take a virtual tour of the great Mosque of Djenne, discover traditional instruments, read the Timbuktu manuscripts, or use the lesson plan to guide students through Mali’s magic.


 If you want to share your course with another teacher, you can
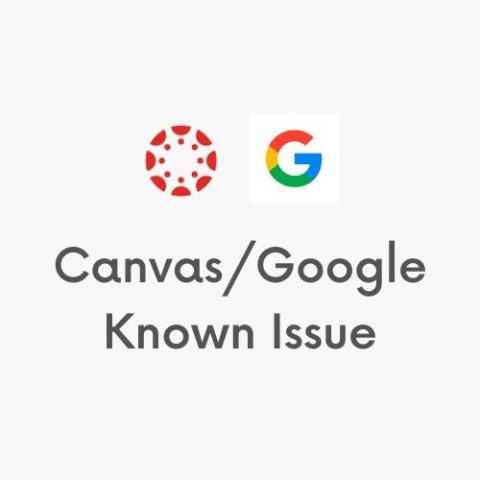


 You can access your contacts and enter them directly in the correct fields. Then you can draft your email. Because you are in Docs you can share it with your grade-level team or co-teacher for feedback and suggestions.