Manage Your Inbox with Filters

Click the "Create Filter button

Our email inboxes can become quite difficult to manage, creating a filter is a great way to clear the clutter without removing important messages that we may need to access later. For example, you may get LMS notifications that you want to filter to a specific place.  Follow these steps to help your inbox manage itself using filter rules.

Suppose you get Exit Ticket response emails. You want to move them all to one folder (Gmail calls them labels) to view all at one time.

Inbox snapshot
You may receive several notifications from Google Forms that you want to create a filter for.

It is best to identify the sender and/or subject of these emails to type into the Search bar. You’ll do an advanced search, so click the drop-down arrow.

Shot of search bar and more option drop-down arrow

Add as much information as possible to ensure you get the right messages filtered. Then click, “Create Filter.”

Click the "Create Filter button

Select any filter rules you see as appropriate for that kind of message. You should apply the appropriate Label (or Create one). You may also want to select “Skip the Inbox.” If the case, rest assured, archived emails in Gmail are not deleted permanently after 30 days. They are permanently stored in your email (and now labelled) until you delete/trash it.

Image of filter menuYou can always remove or edit your filter in Setting by clicking on the wrench icon in the upper-right corner.

shot of filter settings in Gmail

When you are ready to view the filtered emails, access the Label on the left-side menu.

image of inbox label

Build Community through Games and Play

snapshot of playmeo website

In the next few weeks we will be welcoming students back into our buildings. This will be a very exciting time and it will be important to help students feel at ease and games can be a great way to do that. If you are looking for fresh ideas for group activities and games, the Playmeo website is a great resource.

Many activities are free and you can search by learning theme, program outcome, or activity type. Additionally, you can sort by group size and how much time you have for the activity.snapshot of playmeo website

Closed Captions Zoom Update

enable captions in zoom

Closed captions are an essential accessibility tool for people who are deaf or hard of hearing (and for people with other conditions as well). Captioning is also a useful feature for many students as an additional representation of information in a virtual setting. Previously in Zoom, closed captioning was only available from third party providers or by assigning someone to type captions. Now automatic, live transcription of closed captions is an available feature in the Zoom desktop client (not the Chrome browser application). Once enabled, this automatically adds text to the bottom of the video with what the host and others are saying. Please note however, live transcription does not work in breakout rooms, only within the main session.

Zoom captions screenshot
The option to turn on Closed Captioning is in the Zoom toolbar (it may be under “More” depending on window size).

When closed captioning is enabled, as the host you will see the live-transcript below your video, but they DO NOT automatically appear for your participants. Instead, participants will receive a notification and must click the “Closed Caption” option in the menu bar (and usually click Show Subtitle) to start viewing the captions.  Once they have done so, the size of the captions can be adjusted under “Accessibility” in the video settings.

screenshot of adjusting caption font size
Adjust font size in “Video Settings,” under “Accessibility.”

Elaborating on the CC options:

  • Show Subtitles – Displays captioning on the bottom of the video. You can also select Hide Subtitle once subtitles are selected to hide them.
  • View Full Transcript – Opens a panel/pop-up and displays captions in real-time with both the speaker’s name and time stamp. In that pop-up, participants will also see a button to save the transcript (this button might not be available if the host has disabled this functionality). If enabled, click Save Transcript. A copy of the transcript as a .txt file will be downloaded to your machine.
           Note: Transcripts save up to the moment when you click Save Transcript. If you click Save Transcript multiple times throughout the event, it will overwrite/update the existing file. We recommend clicking Save Transcript just before the meeting ends to ensure you have the transcript from the entire meeting. There is no option to auto-save these transcripts.

Bear in mind:

  • Speak slowly, it will help the system capture the words you are saying
  • If there are any loud disruptions (i.e. cars outside or school bells) pause and hold your thoughts until the noise passes.

If you are hosting a meeting with live-transcription, we recommend making a comment at the beginning of your meeting informing your meeting participants that live-transcription is available and a note about how to enable them. Encourage all your students to try turning the captions on to see if it has an impact on their comprehension or capacity to pay attention.  Make it a best UDL (Universal Design for Learning) practice to enable closed captioning during all of your meetings.

For more information on UDL and closed captioning, please read this article.


Second Semester Transition for Canvas

With the start of the 2nd semester arriving soon, we’d like to again provide step by step directions (please see below) for those teachers interested in transferring content from one Canvas course to another. We shared similar directions covering the export/import process at the outset of our school year to assist teachers in migrating content out of courses they had created and built in to the MISTAR-rostered course shells that appeared in their accounts.

  1. Step-By-Step Directions with Pictures on how to export content from old course and import it into the new course
  2. Step-By-Step Video (Screencast) Directions

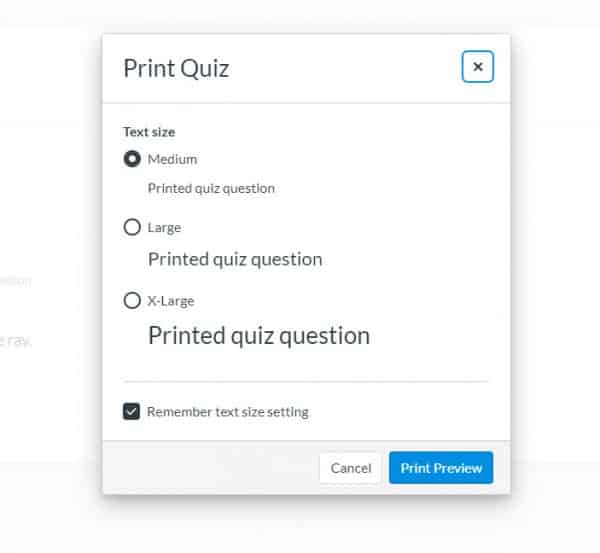
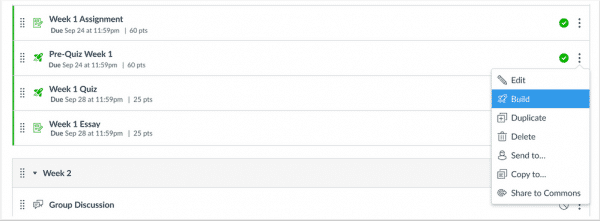
Bulk adjusting due dates and times:

*Please note that canvas exports do not include backups of student interactions and grades. Grades can be exported separately as CSV files.

**Year-long courses do not apply here. However, it is still good practice to make backups of your courses.

Below are some best practices when transferring content, this includes exporting your grades, settings, and downloading additional data.

Best Practice: Keep Sem 1 and Sem 2 clean and separate to have easier content management and processing. For those with a course that spans the year, consider just copying the last module or most recent content from your Semester 1 course into your Semester 2 course so that you are starting with an almost fresh course. (You can always have view access extended to the Semester 1 course so that students are able to review their past work at any time – unless you’d prefer to restrict access to that course content.)
You could also extend course dates in Semester 1 courses if you need students to have more time to participate/work in those courses, although you will need to bear in mind MISTAR grade submission deadlines.

New Rich Content Editor being pushed out over winter break

Post Updated: December 14, 2020

New Rich Content Editor-Canvas

Click Video below to learn about the new Rich Content Editor and notable feature changes

Canvas will be pushing out their updated Rich Content Editor (RCE) on January 16th, 2021 and henceforth it will no longer be optional to use their older editor. To make the transition easier for our staff we will be setting up as default the new Rich Content Editor over the winter break.  Below are some links to help staff better understand and navigate the new RCE.

If you would like to start using the new RCE now, you can. Simply click on ‘Settings’ in your course. On top of the screen click ‘Feature Options’, then click check mark next to RCE Enhancements

Middle School Teachers – FYI, grading periods are being set in Canvas

Canvas grading periods

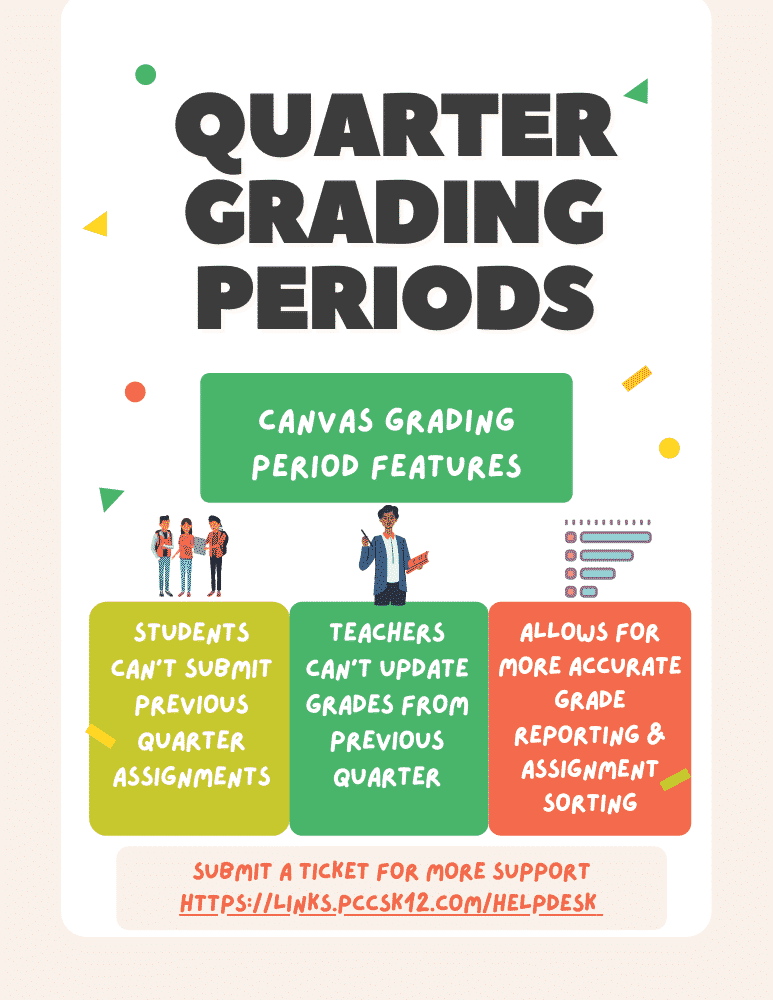
Over this weekend, the district will be updating Canvas with the dates of the grading periods for all of our middle school semester and year long courses. Consequently, starting Monday, middle school teachers will be able to filter their grade books, assignments’ list, and students’ grades pages by quarter instead of having to view all graded content from the entire semester or school year. When grading periods are enabled, the due date of assignment will determine the grading period within which the assignment will appear in the Gradebook. If no due date is set, the assignment defaults to the last grading period available for the course. Please further note, students will only have view-only access to first quarter course content and will be unable to submit work for assignments associated with the first quarter (Q1) since it is not the current grading period. Finally, while teachers can edit their previous term’s course content, they cannot make further adjustments in the feedback or grading of any non-current grading period submissions.

Importantly, while students will still find their definitive grades in MISTAR, this grade period demarcation will also result in a more accurate current grade average, as far as their Canvas grade is concerned, since only the current marking period will be reflected.

*Please note elementary and high school teachers — it is very conceivable that we will similarly update Canvas for courses that span grading periods too, in the coming weeks, to allow for term filtering.

Please find quick overview directions and screenshots in this document.

Non-Student ‘accounts’ appearing in Google Assignments

For teachers who are seeing non-student names in their Google Assignments within Canvas — here’s an explanation and what can be done about it.  Non-student names can appear when students submit work using personal devices that have active and commingled Google accounts. With our district Chromebooks, we enforce the use of only district Google accounts (“… @pccsk12.com”) so students using district Chromebooks can only submit Google assignments within Canvas with the expected name associated with their accounts. On the other hand, on personal devices, any number of Gmail accounts might exists and be set up as profiles within an installed Chrome browser on that computer. On such devices, if a student opens up a Google Assignment and they are logged in with a personal Gmail account in Chrome or in a family member’s Chrome profile, the Google assignment will “assign” to that personal account and when it is submitted in Canvas the teacher will see the associated name, which could be another profile account name other than the student’s district one. There are two (2) things student should do to ensure their assignments are properly associated with them in Canvas. Please let your students with personal devices know, especially those that might claim to have submitted work that might actually be present in Canvas but under an unfamiliar, non-student name.

  1. On the Google Assignment, the students should click “switch account” and choose their @pccsk12.com account if it isn’t already listed
  2. The students should make sure that the Google chrome profile is linked with their @pccsk12.com account. Here is a video you can share that can show students how to do this. https://www.youtube.com/watch?v=gQPqhqJQAaA&feature=emb_logo

For teachers who would like to remove the non-students from your assignments, while not ideal, you can remove the “non-students” individually from each Google assignment by going to the manage people tab — the vertical dot dot dot in the upper right…see screenshot below… [Please consider before removing the non-student, should they have made a submission, trying to identify which student actually inadvertently is behind that submission — and then crediting and providing feedback as appropriate for it.]

Google engineers are aware of this issue and Canvas is hopeful that at some point it can be mitigated.

Supporting Multilingual Learners Using Technology- SCECH Opportunity

BrainPop newsletter

Leverage technology to help your multilingual learners succeed in any context, whether you are face-to-face in the classroom, teaching virtually, or working with students in a hybrid model. Participants will have the opportunity to explore a wide variety of technology tools with Sheltered Instruction Observation Protocol (SIOP) strategies to support both classroom and remote learning for ALL learners.

This is an online event sponsored by Wayne RESA.

Tuesday, December 15, 2020 3:00 PM – 4:00 PM

To register, browse to https://reg.abcsignup.com/reg/event_page.aspx?ek=0047-0004-472c6d6f4c434c68a6ef43efc5f2b1fd

Canvas New Rich Content Editor being set as default over winter break

New Rich Content Editor-Canvas

Canvas will be pushing out their updated Rich Content Editor (RCE) on January 16th, 2021 and henceforth it will no longer be optional to use their older editor. To make the transition easier for our staff we will be setting up as default the new Rich Content Editor over the winter break.  Below are some links to help staff better understand and navigate the new RCE.

If you would like to start using the new RCE now, you can. Simply click on ‘Settings’ in your course. On top of the screen click ‘Feature Options’, then click check mark next to RCE Enhancements

Google Assignment Clarification Post

Our department apologizes for any anxiety we generated with our October 4th blog post around Google Cloud Drive Assignments in Canvas. On October 7th, following input from the community when our newsletter with the posting circulated, we rescinded our decision to remove GDCA access on October 14th.

While staff will continue to have the choice in Canvas to use either integration (GDCA or the new Google Assignments), the underlying reasons to transition to Google Assignments remain and we share them below for your consideration.

  1. GDCA will not work after next September and any course content relying on it will have to be recreated using Google Assignments.
  2. Canvas support won’t address tickets involving GDCA apart from telling staff that the issue is likely a limitation with GDCA and the Canvas user should move to the new Assignments.
  3. Google Assignments functions akin to Google Classroom. Students get their own copy of an assignment, and then submit the assignment back to you for grading. Similar to Google Classroom, you will have a folder in your drive of your class where you can look at the progress of the assignments.
  4. By shifting from Canvas’ SpeedGrader and using Google Assignment speedgrader instead, you can still have functionality to quickly grade between students, and return all student work at once. You will also have access to comments and editing rights to their google docs.
  5. In order to be IDEA and 504 compliant as well as use best practices of providing Universal Design for Learning (starting with the end in mind) we want to give our students the most flexibility and access when showing what they know. Unlike the new Assignments, GDCA does not allow for our current UDL/accessibility suite Read and Write for Google to be used. This means that when you create an assignment for a student via GDCA, you are eliminating their ability to use tools that they may need to complete the assignment (ie. speech-to-text, text-to-speech, word prediction).
  6. Google Assignments has the ability to use Originality Reports. As a teacher you can designate up to 5 assignments per course. With originality reports you can compare student work against hundreds of billions of web pages and over 40 million books with originality reports. Allow students to scan their own work for recommended citations up to three times.
  7. Assignments includes all the features of the GDCA, except Canvas Collaborations. Google asserts this feature is coming soon.

Click Here to learn how to use Google Assignments

Based on the feedback received, we have decided to delay hiding access to Google Drive Cloud Assignments (GDCA) until August 1, 2021.

As always, feel free to submit a service request and we will be able to help support you any way we can.

Thanks!

TIS