Classic Quiz Sunset Timeline Extended
Canvas has announced that it is delaying the sunset timeline for Classic Quizzes until June 30, 2024. Our district may begin restricting the creation of new Classic Quizzes later this year, but existing Classic Quizzes will be available longer than originally anticipated.
New Quizzes Update (January 15): Partial Credit in Matching
In the past, many teachers have bemoaned that partial credit cannot be awarded on Matching questions. Starting January 15, New Quizzes will now have that option! See this post for more information.
Quiz Accommodations in Classic and New Quizzes
We recently received a question about how to accommodate students tests/quizzes in Canvas. There are a lot of moderation options in Canvas, but the specific question was around students that may begin their quiz during class and receive extra time during their Resource hour. Below you will find a resource on how to accomplish this as well information on how students can resume a Quiz, moderating New and Classic Quizzes, and how to reopen an attempt for students.
Please submit a ticket if you have additional questions about this.
You may also view this collection of resources here: https://wke.lt/w/s/5aK43b


 Why would you want to use this feature?


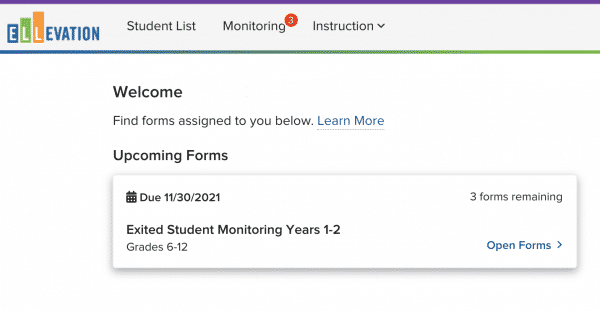
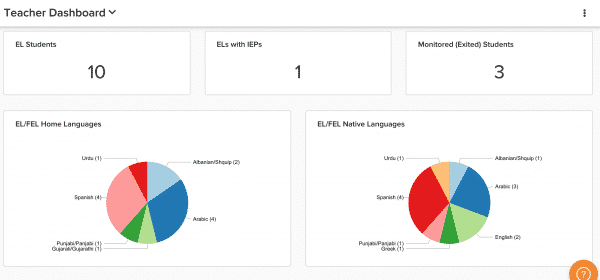 ELLevation Strategies:
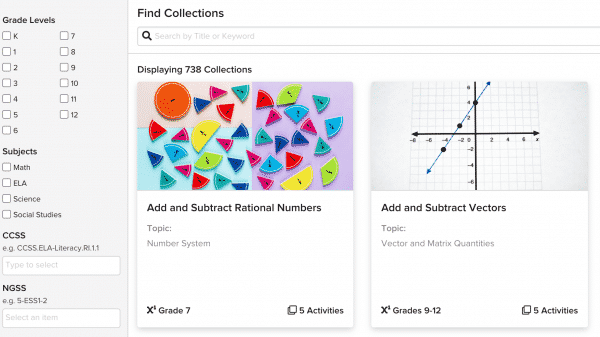 Monitoring: