We hope you are looking forward to a well-deserved summer break! When you feel ready to start making plans for next year, we’d like to offer this fun PD Bingo Board. Feel free to challenge your grade level team or PLC to see who can earn a BINGO first. All the offerings are free. Submit a tech ticket if you need any help.
The good news is, there isn’t much to worry about with Canvas at the end of the year. It will automatically convert your course to read-only for students and roll your course into Past Enrollments. When next year’s course shell appears you will be able to import last year’s course content with a few clicks.
There are a few things you can do if you’d like to make adjustments to your course over the summer or if you like to have a just-in-case copy. Peruse the items below for more information, save it at this link, or get a PDF copy here.
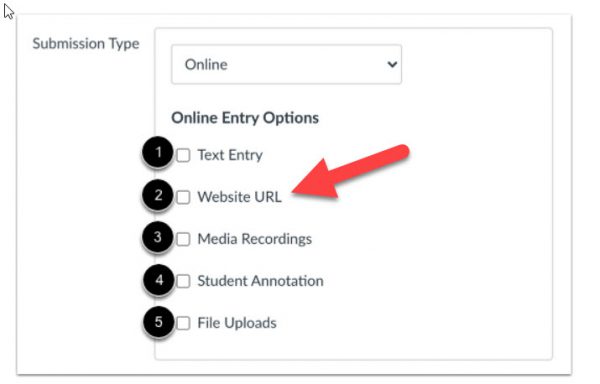
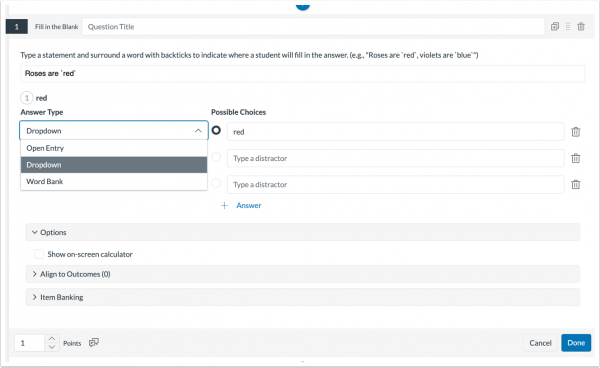
In New Quizzes, this feature allows Instructors to add content as part of the question stem and make portions of the content fillable in the student response.
Change Benefit
This change allows instructors to create fill-in-the-blank questions with rich content such as scientific or mathematical formulas or a table. Additionally, instructors can format fill-in-the-blank questions to appear on separate, distinct lines.
Feature Workflow
New Quizzes question editor
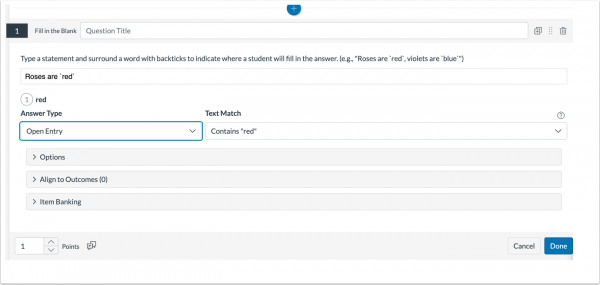
When adding a fill-in-the-blank question, type a statement in the rich content editor and surround a word with backticks to indicate where a student fills in the answer.
Fill in the Blank Answer Options
In the Answer Type drop-down menu, select the Dropdown option [1], enter the correct answers and distractor answers, if needed. Possible Answer Types include a dropdown, open entry, or word bank [2].
If you are retiring from teaching, changing roles, or changing grades, you might be wondering how you can best share some of your teaching materials with your principal or colleagues from your department or team. This post will offer some suggestions. If you are retiring or leaving the district, a direct email will be sent to you regarding how to return district technology at the end of the school year. Please be on the look out for that email if it applies to you.
Share Google Content with Colleagues
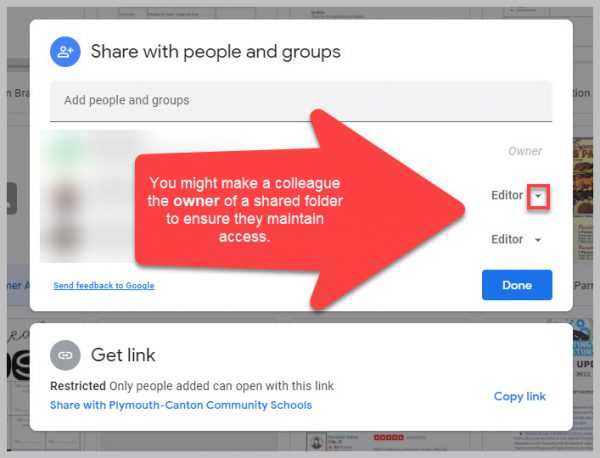
You will want to make sure that a colleague you want to share files with is made the owner of a document or folder. You can change this if you are the current owner.
This option is best if you are leaving the district. Change this setting after you have used Google Transfer or Download.
If you are not leaving the district and want your files shared, but not altered, you might download a folder and then re-upload it to your Drive naming it “3rd Grade Originals.” This will allow you to maintain a copy of your versions of the documents.
Please be mindful about checking folders before you share them to ensure confidential, student information is not shared.
Share Canvas Course Content
You are able to export your Canvas course as an IMSCC ZIP file that can be uploaded into many Learning Management Systems (if you are leaving the district) or shared via a thumb drive.
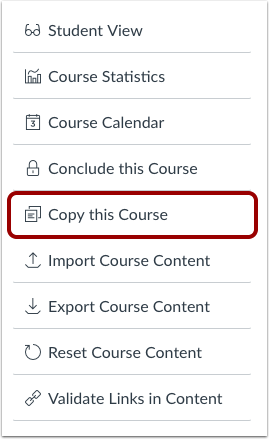
If you want to share your course with another teacher, you can make a copy of your course (found in Settings). When you make the copy you can select the specific content you are willing to share, give it a name (i.e. Bullock Shared US History) and then add your colleague(s) as a teacher in the course. Finally, to make your course more widely available to others at P-CCS you can export your course to Canvas Commons, when you export you can choose to make it viewable to the public or only to P-CCS teachers.
Please submit a tech ticket if you have additional questions about sharing content.
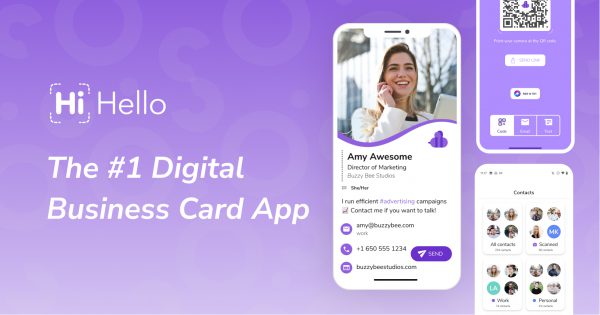
We are excited to share the tool, HiHello. Spend about 5 minutes getting signed up and entering in your information and you get a professional looking email signature and Zoom background. The Zoom backgrounds (pictured below) are especially helpful because they can display your name, position, and pronouns which is helpful if you are in a lot of meetings with families and community members. You can also upload the P-CCS logo or your school logo. Get the mobile app and have access to a digital business cards that can easily be shared. Check it out!
As the year comes to a close, you may be looking for a way to put together a slideshow of photo memories from the school year. You can use Canva to help create and share these. You can set up a slideshow with images on each slide and add background music. Canva also has the complete video editor so you can customize it to your liking. See the tutorials for each of those options below.
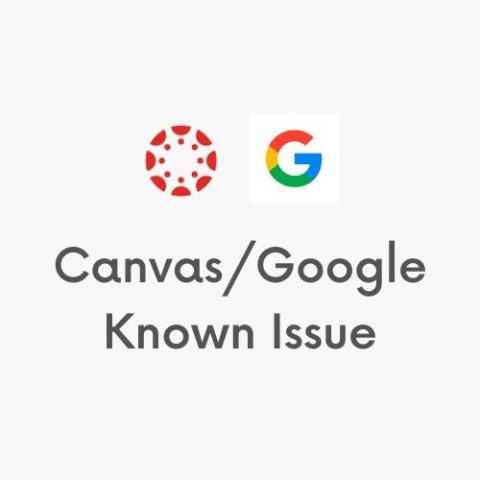
UPDATE: Canvas and Google have worked together to RESOLVE the issue described in last month’s blog post shown below. Thank you for your patience.
————–
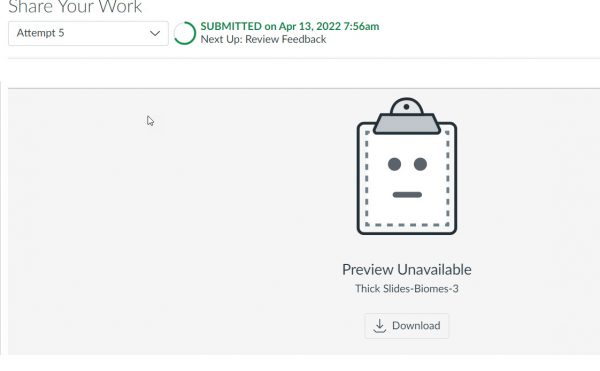
Some teachers are experiencing Canvas assignment submissions that are subsequently inaccessible to them. This has been occurring when a Canvas assignment is created and students load a file from Google Drive. When the teachers open Speedgrader, instead of seeing a preview of the document they see a link to an unknown file type that they are unable to download or view.
Error teachers experience with Google Drive submissions
Students will have a clue that submission didn’t come through correctly when they select and attach an item from Google Drive they will see this:
Students will see this when their attachment is unsuccessful. They should follow the directions linked below to upload the file as a PDF.
This is a Google LTI issue and we are currently working on a resolution. There are several potential workarounds:
Do you love Canva? Would you like to learn more about how to use it in your classroom? Canva Learning Consultants are providing “quick hit” webinars this Spring to help you envision how to use Canvas for student collaboration, use it in STEM courses, Arts courses, Humanities courses, and for parent communication. Register for the 30 minute webinar (Tuesdays from 6:00-6:30 pm) and attend live or catch the recording.
Do a full restart of your laptop at least once a week
If you teach in the Virtual Academy, at least monthly come onto campus (the parking lot is sufficient) with your computer. After initially connecting via district WIFI, restart your laptop and log back in, then allow 15-20 minutes for any updates to run in the background while you are on it. So if you are planning to come on-campus for any reason, please bring your laptop, and restart and log into it when there!
Making sure you perform periodic restarts and logging into your laptop while on the district network does several important things to improve performance including clearing the laptop’s Random Access Memory (RAM) which can otherwise over time bog down its system resources and allowing important and useful district updates to to run at start up (as one example, a needed component to run the updated Canvas Studio Screen Recorder requires a one time laptop restart and new log in while in district so a log in script that is associated with user accounts can install it).
We appreciate your help to ensure the best possible performance of your laptop. Please submit a tech ticket if you have any questions.
If you have not heard of Matt Miller, author of Ditch that Textbook and other titles, it is your lucky day! His website, books, and podcast are full of great teacher tips. Recently, he has promoted an EfficienTEACH series to help you save time and have a big impact on student learning. Check out some of his fantastic resources below, click the picture to access the links.


 If you want to share your course with another teacher, you can