Highlights from the February Google for Education Newsletter

Google newsletter 36

Issue 36 was just released today. Below are some of its notices for your consideration.

Be Internet Awesome presents Safer Internet Day 2021
Join Be Internet Awesome on @googleforedu Twitter and Facebook for the 7-Day Internet Safety Challenge – promoting online safety all week long. We’ll share four new activities and tools for educators to use with their students.

Code.org celebrates Black Voices in Computer Science
Although computer science is foundational to every industry and field of study, representation and participation in CS is still far from balanced. Watch and share this inspiring video from our partner Code.org, advocating for greater access to CS education for Black students.

Arts & Culture: Blob Opera
From Google Arts & Culture’s Lab and artist David Li comes Blob Opera. Exploring the original musical instrument: our voice. Play four opera voices in real time. Explore pitch then record and share your musical composition. No singing skills required.

Arts & Culture: Preserving Egypt’s Layered History
Brings to life the archaeological discoveries, the archaeologists and preservation processes. With stories, 3D and AR models, Quizzes, videos, virtual tours and Choose Your Own Adventures, the project brings the treasures of Egypt into the classroom.

Wakelet & Google for Education: Showcase Challenge
Get involved in the Wakelet & Google for Education: Showcase Challenge! Share your ideas for making the most of Google for Education tools and showcase your expertise inside a Wakelet collection to get your hands on our exclusive digital swag pack.

Missed an issue of the Google for Education newsletter? Check out past issues here.

Did a friend or colleague forward you this email?
Sign up to get Google for Education updates in your inbox.

Black History Month Resources

Image of Applied Digital Skills black history page

February is Black History Month. Wayne RESA has put together several resources that teachers can use this month and throughout the school year to help infuse Black History in the curriculum.

Additionally, Flipgrid has curated several topics for students to engage with on their platform.

Image of Black History collection in Flipgrid

Wide Open School by Common Sense has linked several Black History and Culture lessons organized by grade, Preschool-12th grade. Google for Education has also released several new lessons in their Applied Digital Skills curriculum.

Image of Applied Digital Skills black history page

Tips for the Secondary Hybrid Schedule

Now that P-CCS  is bringing middle school and high school students back on-campus, teachers may wish to further adjust their instruction for optimized learning with the new schedule. The hybrid schedule feels very unique to the times we are living in. Fortunately, schools across the country have been using it and teachers have insights to share. For this post, I have borrowed mostly from the work of Jennifer Gonzalez (Cult of Pedagogy) and Catlin Tucker, an experienced, blended learning coach. Consider reading the original posts for more information.

Four Models:

  1. Station Rotation: Think of your week or class period in 3 kinds of “stations” for students to rotate through: teacher-led, online activity, and an offline activity. Here’s a great template from Stephanie DeMichele. Here’s a link to some specific ideas for core content areas.
  2. Flipped Learning: Move the act of talking at students to asynchronous video so it can be more accessible for all (pause, re-watch, captions). Think of your week or class period in terms of a pre-video activity, during-the-video activity, and a post-video activity. If you desire, save time, by recording snippets of intended instruction during your live class to post in Canvas, directions here.
  3. Playlist Model: Playlists allow students to move through a sequence of learning activities. The playlist can build in choice as far as what modality and what combination of activities students choose. This model is also very similar to a hyperdoc which guides students through a complete lesson flow. In this model, teachers design the lesson in-advance and then spend time in class connecting with individuals and small groups to answer questions, clear misconceptions, and provide feedback.
  4. Pre/In/Post Class: This model simply helps you think about planning in terms of synchronous and asynchronous. Utilize Sections in Canvas to divide your class into cohorts so that each one sees their work at the appropriate time. See the graphic below from Catlin Tucker’s blog.
Ideas for pre, in, and post class work.
Graphic created by Catlin Tucker. Click the image to view the post.

Tips from Teachers (curated from Jennifer Gonzalez of Cult of Pedagogy)

  • Make the face-to-face time special–Try not to use this time to give all your tests or “cram” in all the content you plan to deliver. Use it build relationships and interact with each other.
    • Putting direct instruction on video prevents you from having to repeat yourself over and over and allows students to watch at their own pace
  • Chunk the time–As we move to the block schedule on top of the hybrid set-up it is helpful think of your time in various segments. You can select one of the models above to guide you. If you desire to have the at-home cohort log-on to your synchronous class time you might consider some of these models. They were shared by Beth Alexander, the Director of Teaching and Learning at a school in Toronto.
  • Build community–This is always important and still is as teachers and students face this new classroom set-up.

Teachers can continue to use Canvas and other tech tools to manage and organize their courses. Reach out to a Tech Integration Specialist if you want a thought partner in this process. Submit a tech ticket and select the “Tech Integration” option.

If you are looking for more ideas, check out this collection of resources: https://wke.lt/w/s/N62hdh


Managing Your Modules

Anyone with a year-long course (or 100+ modules), might be noticing that is takes quite a long time for all your modules to load. Students and families may also be experiencing this lag when they click the link for their daily work module. To help save time and frustration we recommend that you free up some space in one of two ways:

  1. Unpublish modules from early in the school year. Image of "unpublish" icon
  2. If you or your students are still experiencing a slow down, you can copy the module to your Sandbox course and then delete it from your main course.

Image of steps to copy and delete modules

Updating the Zoom App

Keep calm and update zoom

In order to get the most out of our Zoom experience, it is important to update the app. An out-of-date Zoom app may lead to sound or other technical issues. Additionally, Zoom has recently pushed out live captioning and the ability to allow co-hosts to set up breakout rooms. These features don’t appear unless you are running the latest version of the Zoom app. Chromebook users or any device that used the mobile app should be getting these updates automatically. If you are using the desktop client/software on a school-issued HP Probook, a Windows, or Mac device you will need to update manually.

Next Wednesday afternoon, February 10 17th (rescheduled to avoid any possible, but unlikely conflict due to it being Count Day), the district will activate a prompt so that when you open the Zoom app, if it can be updated to a newer version, you will be required to update it. Before any meeting you might have, please give yourself a few extra minutes to take care of that update by launching the app earlier than you might otherwise. And be advised that students may run a little late if they launch the app and find they are being prompted to update. To avoid any issues you can always check for updates at a time that is most convenient for you.

Helpful Tip: Zoom automatically signs you out of your account fairly often. If you notice your thumbnail picture is not showing or your virtual background is missing, you may want to relaunch the Zoom app and make sure that you are signed into the app and not just the Zoom website.

Use Sections to Manage Green/Blue Cohorts

Image of finished sections

Sections allow you to subdivide students within a course. It allows you to set different due dates for assignments, quizzes, and discussions. This is ideal for managing the Blue and Green Cohorts in the hybrid schedule.

Set up Groups

First go to Settings from the Course Navigation menu and you’ll find a tab entitled “Sections.” You can add and name your sections however you wish.

Here’s what you might have for your classes, the sections will be ordered alphabetically:

Image of finished sections

Add Students to Sections

Click on “People” in the Course Navigation menu to add students to the proper section.

Visual of steps to add people to sections

A pop-up will appear and you can start typing the name of the cohort and it will appear for you to select or you can click “browse” and the options will appear.

Image of editing section enrollments

Do this for each user. When finished you’ll be able to see which cohort/section each user is in.

Image of cohorts denoted in roster

You can remove the section following the same grading process.

Assignments for Sections

For the purpose of syncing with MiStar, it is very important you ensure one of the “Assign to” groups is listed as “Everyone”
or “Everyone Else.” Do not assign to Blue Cohort and Green Cohort, grading sync will not work.

Image indicating use of everyone or everyone else


Semester 2 and Quarter 3 Courses Published in Canvas

Publishing of Canvas Courses

To assist teachers, Canvas automatically published all Semester 2 and Quarter 3 courses automatically generated through the MISTAR/Canvas sync

Please note the following:

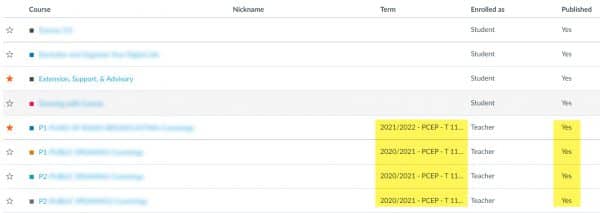
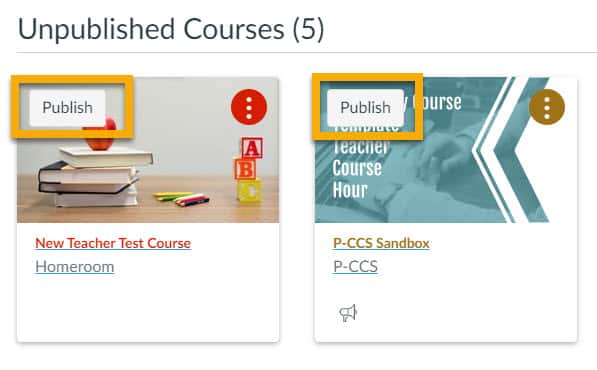
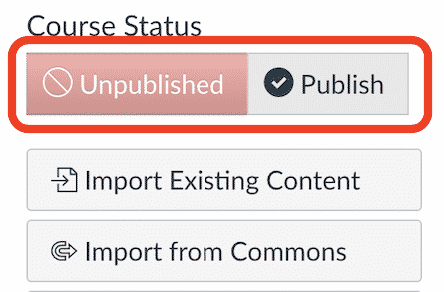
  • Students only have access to Published courses. If you have any courses that you do not want students to see, please be sure to Unpublish those courses. (see below) If a course is Unpublished they will not see it on their dashboard. To Unpublish a course, go to the course you don’t want students to access and select Unpublish at the top-right part of the screen. You cannot unpublish a course after you assign something to a student.
  • Manually created courses were not automatically published. If you would like to publish any of your manually created courses, please follow these instructions.

Reminder: Customizing Your Canvas Dashboard

To customize the teacher or student dashboard to show certain courses please see the graphic below:

Dashboard