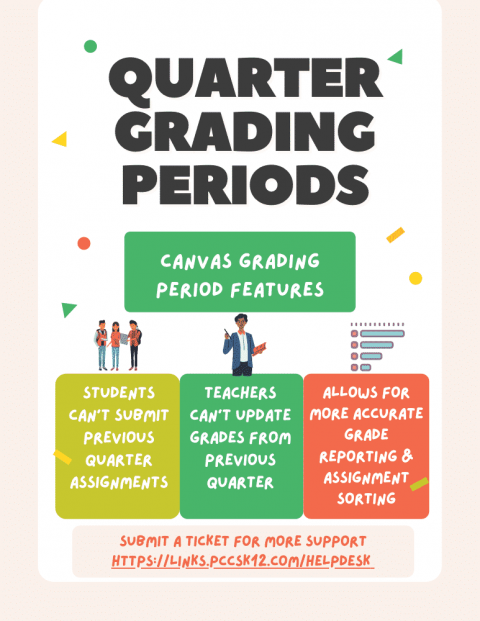
As of November 19th, now that Quarter 1 grades have been turned in at the secondary level, Grading Periods will be in place in Canvas to reflect the closing of Q1 grades in MiStar. Students will have view-only access to first quarter course content and will be unable to submit work for assignments associated with the first quarter (Q1) since it is not the current grading period. While teachers can edit their previous term’s course content, they cannot make further adjustments in the feedback or grading of any non-current grading period submissions.
When grading periods are enabled, the due date of an assignment will determine the grading period within which the assignment will appear in the Gradebook. If no due date is set, the assignment defaults to the last (current) grading period available for the course. Therefore, if there is a quiz or assignment that a student must still complete from a past quarter, you might make a copy of that quiz/assignment, give it a due date in the current grading period, and assign it just to the few students that need it. In that case, grade passback to MiStar should be avoided and, should you want it reflected in MISTAR manually enter the grade for those students in the Q1 quiz or assignment instead (note, even if this is done, the student’s viewable-as-of November 12th report card, won’t reflect any change).
Importantly, while students will still find their definitive grades in MISTAR, this grade period demarcation will also result in a more accurate current grade average, as far as what Canvas reflects, since only the current marking period will be presented.
Please find quick overview directions and screenshots in this document.
*Please note elementary teachers — it is very conceivable that we will similarly update Canvas for courses that span grading periods too, in the coming weeks, to allow for term filtering.
Submit a ticket for more support.

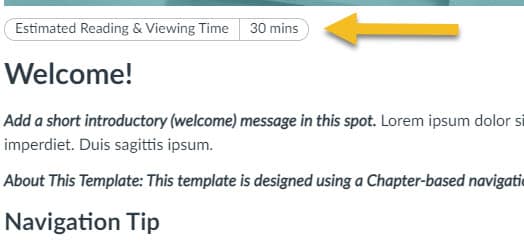 When you enter into a task, it is helpful to know approximately how long something might take. Don Lourcey, on the Iredell-Statesville School District has gathered some code so that an estimated time to complete can be added to the top of your Canvas pages and assignments (see image sample above). This small step might be very useful for students and families working on your course at home and help the students in front of you to manage their attention level.