
2022 has brought on the Wordle craze. If you or your students have caught Wordle fever, you might consider how to incorporate it in the classroom. Check out the ideas below (including some math versions).
Other Wordle spinoffs to explore include:
2022 has brought on the Wordle craze. If you or your students have caught Wordle fever, you might consider how to incorporate it in the classroom. Check out the ideas below (including some math versions).
Other Wordle spinoffs to explore include:

High School teachers of PCEP year-long courses, please be aware that Grading Periods will be set up in your Canvas courses denoting each semester.
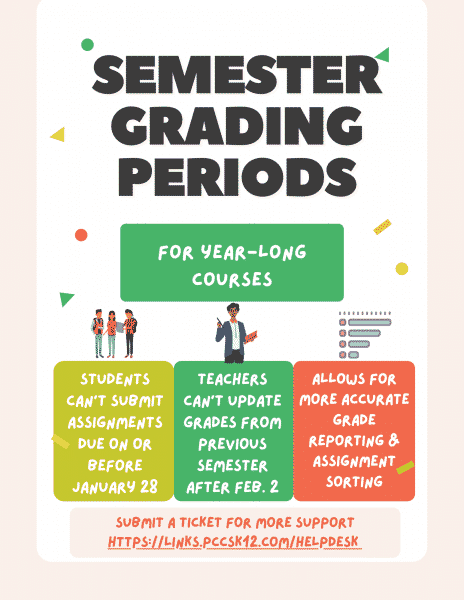
Semester 2 began January 31st, 2022. You can filter your grade book to view assignments with due dates in the Semester 2 grading period by following the steps here.
The information above was also noted in our January 18, 2022 blog post.
If you have questions, please submit a tech ticket.
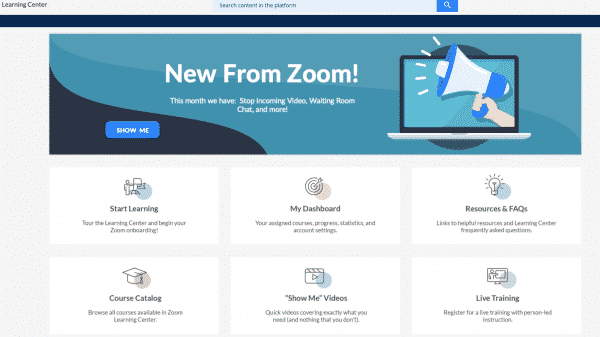
There have been some updates to Zoom that help facilitate online learning for teachers and students. Check them out below.

All instructional staff that presently have P-CCS Windows laptops will be expected to exchange them this spring for newer, faster laptops that have recently been purchased and are now being readied. In advance of that exchange we will periodically share more details.
For starters, to assist those who will need to transition devices, please consider these steps on your current laptop….
As always if you have any questions or need any assistance with this process, please complete a tech request here: https://mi50.mlworkorders.com/Login.aspx (As a reminder your username is your full email address, and the password is your network password – typically the one you use when logging into your computer)

As we approach Semester 2, those of you who are teaching multiple sections of the same course might consider cross-listing in Canvas. Cross-listing allows you to move section enrollments from individual courses and combine them into one course. This feature is helpful for instructors who teach several sections of the same course and only want to manage course data in one location. Many teachers who have tried it have asserted they would never go back to the old way since cross-listing is such a big time saver. However, this action should only be done before a semester starts. Indeed, Canvas recommends it be done before a course is published. If it is done after a course is published and notably student work has been submitted, that student work will be lost. Please review the slideshow below carefully to help you decide if you want to do it.
Please reach out to a Technology Integration Specialist if you need help deciding if this is right for you or if you want assistance setting it up.
Semester 1 will be ending on January 28, 2022.
Please remember to publish your Semester 2 courses!
Semester 2 begins January 31st, 2022. You can filter your grade book to view assignments with due dates in the Semester 2 grading period by following the steps here.

Please reach out if you have additional questions about these updates.

As we draw near to the end of the first semester, you might be looking for some ideas to put students in the driver’s seat of reviewing for exams or projects. Here are a few ideas and templates.
Submit a tech ticket if you have questions about implementing these strategies in your classroom.

Canvas has announced that it is delaying the sunset timeline for Classic Quizzes until June 30, 2024. Our district may begin restricting the creation of new Classic Quizzes later this year, but existing Classic Quizzes will be available longer than originally anticipated.
In the past, many teachers have bemoaned that partial credit cannot be awarded on Matching questions. Starting January 15, New Quizzes will now have that option! See this post for more information.
We recently received a question about how to accommodate students tests/quizzes in Canvas. There are a lot of moderation options in Canvas, but the specific question was around students that may begin their quiz during class and receive extra time during their Resource hour. Below you will find a resource on how to accomplish this as well information on how students can resume a Quiz, moderating New and Classic Quizzes, and how to reopen an attempt for students.
Please submit a ticket if you have additional questions about this.
You may also view this collection of resources here: https://wke.lt/w/s/5aK43b

There is a new option for your screen when working in Google Slides. You can view or hide the filmstrip. What’s filmstrip? It is the vertical display of slides to the left of the slide your are working on.
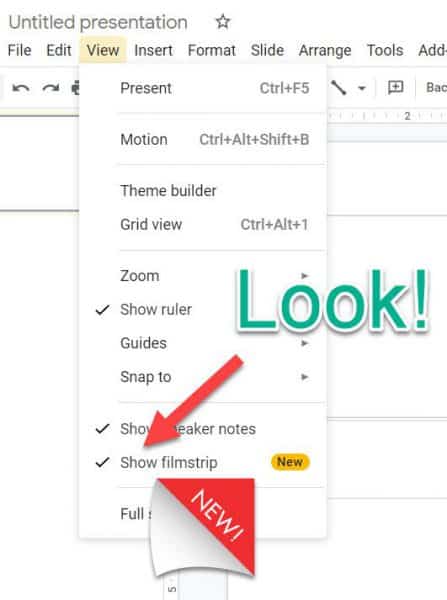
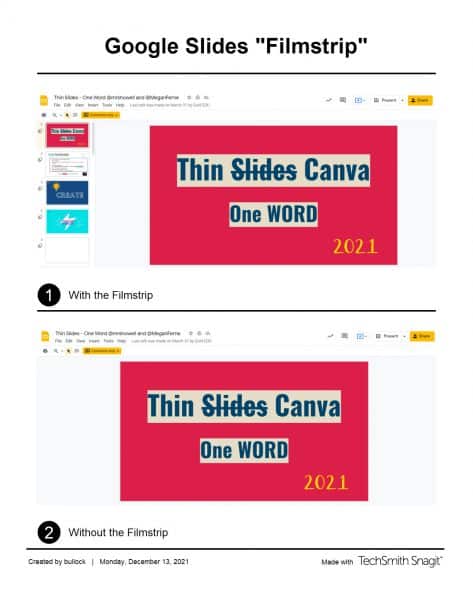 Why would you want to use this feature?
👉🏽 You are presenting, but still want to be able to edit on the slide, this gives you more space
👉🏽You have a drag and drop activity for students, you can utilize more of the gray area on the sides
👉🏽 You want to keep upcoming slides hidden
Interested in drag and drop activities for Google Slides? Check out these resources: