Access to Microsoft Office 365 desktop apps ending in August

A1 Plus retirement

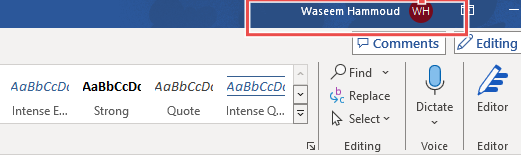
Earlier this month, Microsoft notified our district that they would be ending our access to Microsoft Office 365 desktops apps when they retire our licensing program (Office 365 A1 Plus) on August 1, 2024. Their announcement impacts all school districts with the same licensing. While we shared with them our frustration for the short notice, they aren’t changing the retirement date. After August 1st, staff that have downloaded and installed Office 365 versions of Word, Excel, and PowerPoint will find those programs no longer work. You can identify if you have an impacted program by launching one of those programs and looking in the top right corner for your name and initials. If you see your name and are signed in, you have a program that will stop working in August. See this pic for a sense of where to look in Word.

where to locate name in Office

Some options post August 1st for those impacted.

  1. Use the Google Workspace for Apps (Recommended). As a Google Workshop for Education district, it is strongly recommended that staff use Google Docs, Sheets, Slides, etc. All of these apps (and more) are available through Google Drive.
  2. You can still use Microsoft Office 365 online since that licensing remains. Browse to portal.office.com and sign in using your email address and network (not Google) password.
  3. Use a free office suite alternative, such as Libre Office, which is available in the Company Portal for those that want to download and have installed a desktop office suite. Libre Office is highly compatible with Microsoft Office documents. It can open and edit all of the Microsoft Office file formats, as well as save in those same file formats. See this video guidance for how to set it up to natively load and save in Office formats.
  4. Departments/schools interested in purchasing licensing for Office 2021 for one or more of their staff can submit a service request so our department can work with the requester on their purchase and our installation. Current REMC pricing for Office Standard runs through June. The new purchase price will be updated in July. 


Don’t Just Copy-Paste: Reflect and Revise!

As the academic year winds down, it’s tempting to take the easy route and copy over this year’s Canvas course into next year. After all, why reinvent the wheel, right? But before you hit that “Import” button, consider this: What worked well for your students this year? What fell flat? How can you enhance the learning experience for everyone involved?

1. Reflect on Student Engagement

Think about what lessons went well and which units needed a lot of repeated explanations. Is there content you could add or modify in Canvas that would assist? Look back on assignments, were there several that were never completed?

2. Seek Student Feedback

Your students are your best critics and allies. Send out a survey asking for their honest opinions. What did they enjoy? What frustrated them? Encourage them to share their insights on Canvas navigation, content clarity, and overall experience. Their feedback will guide your revisions.

3. Evaluate Content Relevance

Consider the relevance of your course materials. Are there outdated resources or redundant content? Trim the excess and focus on what truly matters. If there’s material you haven’t used in several years, don’t bring it with you into next year.

4. Explore New Tools and Features

Canvas evolves, and so should your course. Investigate new features, plugins, and integrations like Google Assignments. Maybe there’s a better way to organize assignments (into Modules, not pages) or facilitate peer reviews. Perhaps you can start using Discussions as a quick exit or entrance ticket. You consider using New Quizzes for formative assessments.  Stay curious and open-minded.

5. Collaborate with Colleagues

Reach out to fellow educators. Share your successes and challenges. They might have brilliant ideas or solutions you haven’t considered. Collaboration fuels innovation.

Conclusion

Copying over your Canvas course is like reheating leftovers—it’s convenient, but it won’t satisfy anyone in the long run. Take the time to evaluate, tweak, and reimagine. Your students and their families will thank you for it!

Remember, teaching is an art, and your Canvas course is your canvas. Paint a masterpiece that inspires, engages, and empowers your learners. 🎨✨

Watch Out for Phishing Emails – A Warning for Teachers (and all others)

phishing icon

Phishing is a form of cyber attack that has become increasingly common and sophisticated in recent years. As teachers, we need to be on guard against these malicious attempts to steal our login credentials, personal information, or install malware on our devices.

What is a Phishing Email?

A phishing email is a fraudulent message designed to look like it comes from a legitimate source, such as a company, bank, or even our own school district. The email may ask you to verify account information, login with your credentials on a fake website, or open an infected attachment or link.

The goal of the attacker is to trick you into divulging sensitive information or deploying malware on your computer or the school’s network. Phishing attacks rely on social engineering to exploit human psychology and tendencies to trust.

How to Spot a Phishing Email

While phishing emails can be quite convincing, there are some common warning signs to watch out for:

  • Emails creating a sense of urgency, fear, or panic to prompt an impulsive reaction
  • Misspellings, bad grammar, or inconsistencies in the email content or sender address
  • Requests for sensitive information that a legitimate company should already have
  • Generic greetings like “Dear User” instead of your name
  • Suspicious links or attachments

Remember, legitimate companies will never ask you to provide things like passwords or credit card numbers via email.

Stay Vigilant

As teachers trusted with handling confidential student data and accessing sensitive school systems, we must remain vigilant against phishing scams. Always scrutinize email sources, hover over links before clicking, and avoid opening attachments unless you are absolutely sure they are safe.

If you suspect a phishing attempt, do not respond and immediately report it to our IT department by clicking the phishing hook icon in our email. On mobile, it may be toward the bottom of the email and on a laptop it is off to the right. This will report the phishing attempt to the district.

phishing icon

Protecting ourselves and our district from these cyber threats is crucial. Let’s do our part to identify and stop phishing attacks before they cause harm. A few moments of caution can prevent a major security breach.

Things I Wish I Would Have Known- Canvas Edition: Make Modules, not Pages

If you have been using Canvas for awhile (since 2021), you may have worked to build Pages in Canvas that had the plan for your day/week/month. They may also include links to other Canvas Assignments and resources. It may look something like this:

sample Canvas page

While this page made a lot of sense as you rushed to put together content for virtual days, you might consider making the shift to Modules. Over time, these pages have probably proved cumbersome to update and it can result in a clunky workflow for students. It may also feel like a double load of work if you also update some daily slide for the classroom. We’d suggest letting go of these Agenda pages in favor Modules organized by week or topic. Check out some examples below:

This set up may prove easier to update and blends nicely with the face-to-face learning environment, pointing students and families to exactly what they need to know.

Why Use Modules

  1. Content Organization: Modules act like a table of contents, allowing instructors to organize various course elements such as Pages, Files, Discussion Boards, Quizzes, and Assignments. By grouping related content together, Modules create a coherent flow for students.
  2. Interaction Requirements: Modules allow instructors to require student interaction with specific content before proceeding to assignments. For example, students might need to review a reading or watch a video before attempting a quiz.
  3. Centralized Management: Instructors can manage all course materials within a single Module. This streamlines the course-building process and keeps everything organized in one place.
  4. Flexible Structure: Instructors can structure Modules based on their natural course organization. Whether by unit, day, week, topic, or outcome, Modules adapt to the instructor’s preferred format.
  5. Visual Flow: Using indentation, emojis, and text headers in Modules enhances visual flow, especially when dealing with a large amount of content. Headers help delineate different sections, and instructors can even use emojis for quick scanning.
  6. Student Experience: By simplifying navigation (e.g., hiding unnecessary links), Modules create a better experience for students. Chunking content into digestible bits prevents overwhelming learners.

Protect Yourself and Our Students: Password Hygiene for a Safer School Network

In today’s digital world, our school’s data, from student records to email accounts, is constantly targeted by cybercriminals. One of the most important ways we all contribute to the safety of our school’s network is by practicing good password hygiene.

What is Password Hygiene?

Password hygiene refers to the habits and techniques you use to keep your accounts secure. Good password hygiene makes you a much harder target for hackers.

Why Does it Matter for Our School?

  • Protecting Student Data: Students trust us with their sensitive information. Strong passwords help prevent breaches and keep their details safe.
  • Avoiding Disruption: A single compromised account can spread malware, disrupt classes, and cause headaches for everyone.
  • Setting a Good Example: Students look up to us. By demonstrating good password habits, we teach them valuable cybersecurity skills for life.

Password Hygiene Best Practices

  • Uniqueness is Key: NEVER reuse passwords.  If one account is compromised, a reused password puts EVERY account using it at risk.
  • Avoid the Obvious: Don’t use your name, birthdays, street address, family names, or other easily guessable information in your passwords.
  • Get Creative with Passphrases: Instead of complicated passwords, try a passphrase. It’s longer, easier to remember, but harder to crack. Example:  “IRideMyBlueBicycle2School!”
  • Don’t Be Afraid of Complexity: The longer and more random your password, the better. Mix uppercase, lowercase, numbers, and symbols.
  • Absolutely NO Sharing:  Your passwords are like your toothbrush – never share them with anyone, no matter how much they insist!
  • NO Common Passwords:  Lists of the most common passwords (like “123456” or “password”) are easily available to hackers. Don’t make it easy for them!
  • Password Managers: Consider a password manager – it stores and generates strong, unique passwords for each of your accounts.

Additional Tips

  • Change Passwords Regularly: A good rule of thumb is to change your critical passwords (network, etc.) every 3-6 months.
  • Enable Two-factor Authentication: If a website or service offers it, use it! This adds an extra layer of protection.

We’re all in this together!

By following these simple password guidelines, teachers and staff can dramatically improve the security of our school community.  Let’s all work together to create a safe and secure digital learning environment.

Need More Help?

If you have questions or need assistance with your passwords, don’t hesitate to submit a service request.

FREE Summer PD from Teq

Teq free PD

Make your summer learning fun and convenient with Teq’s free, virtual PD! Check out their great lineup of courses for everything from brushing up on basics to exploring cutting-edge edtech. Free to register/attend and space is limited, so snag your spot early!

Sign up for any course, a series, or join them for all! Topics include:
• Google: Transitioning away from Jamboard; Gemini AI tool; and getting started or learning advanced skills with Google for Education apps like Docs, Classroom, and Slides.

• Lumio: Get started with SMART’s online lesson delivery platform or take your skills to the next level.

• Blended Learning: Brush up your blended learning skills and learn some new tools with either our beginner course or the advanced course.

• Administrator: Start your school year off right before it begins with administrator-focused PD.

• Minecraft EDU: Learn how to implement Minecraft EDU in your class or school and how to content it across content areas.

• Getting Started with CSDF: Learn how best to align to the new Computer Science and Digitial Fluency standards.

• Microsoft for PBL: Discover how to use Microsoft tools to deliver memorable PBL.

• Tinkercad: Learn how to use Tinkercad to help students create amazing 3D designs and prints.