Are you wondering how you can use Google Apps with younger students? Kindergarten teachers Christine Pinto and Jessica LaBar-Twomey, who are also the authors of Innovating Playhave a great blog with ideas, a spreadsheet with templates and can be followed on social media.
I wanted to alert our community to a benefit program that I hope we can spread the word about to our eligible families. In the Consolidated Appropriations Act of 2021 which was recently signed into law, Congress has specifically carved out $3.2 billion dollars to provide Emergency Broadband relief (a discount of up to $50 per month towards broadband service) to qualifying eligible households. Eligible households can also receive a one-time discount of up to $100 to purchase a laptop, desktop computer, or tablet from participating providers if they contribute more than $10 and less than $50 toward the purchase price.
As of May 12, 2021, eligible households will be able to enroll in this program to receive a monthly discount off the cost of broadband service from an approved internet service provider (American Broadband, Charter, Comcast, T-Mobile/Metro by T-Mobile, and Wow are among these ISPs). Eligible households can enroll through their approved internet service provider or by visiting https://getemergencybroadband.org.
A household is eligible if a member of the household meets one of the criteria below:
Has an income that is at or below 135% of the Federal Poverty Guidelines or participates in certain assistance programs, such as SNAP, Medicaid, or Lifeline;
Approved to receive benefits under the free and reduced-price school lunch program or the school breakfast program, including through the USDA Community Eligibility Provision in the 2019-2020 or 2020-2021 school year;
Received a Federal Pell Grant during the current award year;
Experienced a substantial loss of income due to job loss or furlough since February 29, 2020 and the household had a total income in 2020 at or below $99,000 for single filers and $198,000 for joint filers; or
Meets the eligibility criteria for a participating provider’s existing low-income or COVID-19 program.
Please note, the benefit program described above is different from the permanent Lifeline program, which is another benefits program some of our families qualify for and likely could benefit from — thanks for sharing news of both for their consideration.
As May approaches and we anticipate the rest of the year, it is a great time to encourage students to create to show all they have learned. There are so many unique ways for students to produce and publish something meaningful. Here are just a few tools and ideas.
WeVideo: WeVideo is a video editor built for all skill levels! When you get started, it will ask you a few questions about your comfort level with video editing and provide you with a dashboard that fits you. They have also rolled out real-time collaboration so students can work together. *WeVideo premium is available at the middle schools.
Canva:Canva is a great tool for graphic design. They offer free, premium accounts for educators. Students can learn design tips and use templates to create eye-catching posters, logos, and social media graphics. Maybe you could have students design the buttons and theme for next school year’s Canvas page. All students can access Canva via our Clever portal – https://clever.com/in/pccs.
Adobe Spark: Adobe Spark is similar to Canva, but I believe it is a great tool for walking students through a video creation process. Teachers and secondary students, when you are ready to get started with Adobe Spark, you can log in by following the instructions athttp://links.pccsk12.com/adobespark.
Podcasts: Have students create their own podcasts. They can prepare episodes to help review material for upcoming exams or advice for next year’s class. When creating the assignment, select the submission option of “Media Recording.” For the best results, student recordings should be less than 15 minutes. If you want them to be longer, reach out for other tool recommendations.
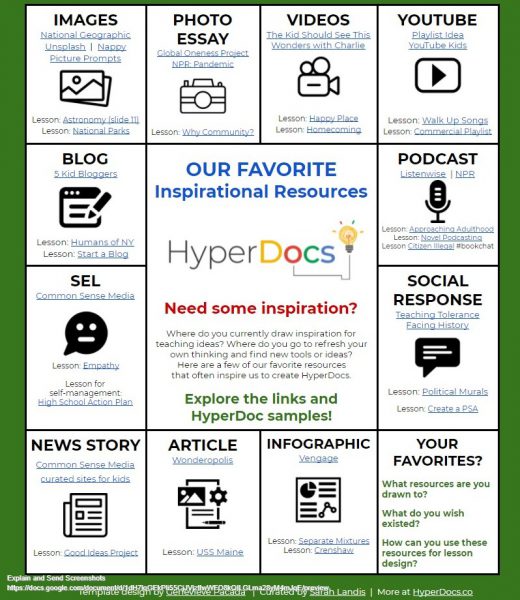
Looking for ideas that will inspire your students? The teachers behind HyperDocs have curated some resources to get the juices flowing with recommended lessons to go with them. Click the image below to explore.
A new version of the Zoom app will be available next week for download at https://zoom.us/download. Zoom will also be performing a staggered release for iOS and Android on applicable app stores. This update will include the release of the Immersive Views feature(see description below) and minor bug fixes.
April 26, 2021 version
New and enhanced features
Meeting/webinar features
Immersive Views
Recreate the feel of your class or conference room by placing video participants onto a single virtual background. Participants are automatically placed onto provided scenes, but the host can upload their own custom background and adjust the arrangements as needed. This requires client version 5.6.3 or higher and works best when using Virtual Background, but not required.
Resolved issues
Minor bug fixes
Resolved an issue for a subset of users regarding crashes when switching audio devices
Resolved an issue for a subset of users regarding an inability to end a webinar
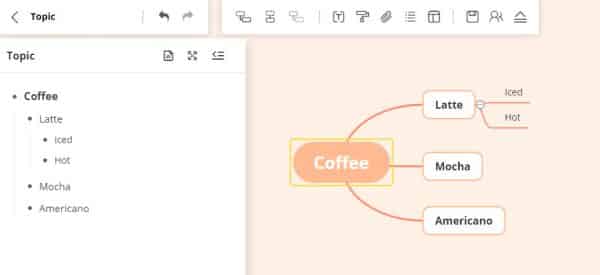
GitMind is a great, free tool for mind maps and brainstorming. You can easily sign-up with your Google account. There are several templates ready for use and they have a category for education. Below is a video overview.
There are no ads on the page. The only “paywall” I can find is the ability to export in other formats, which you can do with “points” you earn by using the platform. You can easily share work with a link and you can add collaborators.
Ideas for Classroom Use
If you teach younger students you might not have them create their own, but you can work as a class. There are templates for the elements of a story and working with words.
Older students could create their own, there a templates for timelines and essay structures. At the year’s end students could create a mind map to review material from the entire course. You can also edit your mind map by editing or importing an outline and the program will add it to your mind map.
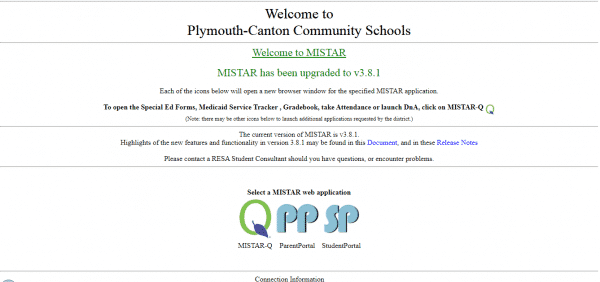
On Monday, April 19th, the district’s landing page for MISTAR-Q will be updated. WayneRESA staff are also working on a mobile version which will direct to mobile apps, to be installed at a later date.
The current landing page that has been around for quite a while looks like this:
Visuals are an important element to help all people understand the message we are trying to convey. Finding good icons on the internet can be tricky as many sites want you to pay to use their icons and the emoji keyboard options starts to feel a little stale. The creator of the popular site SlidesMania (has a wide range of Google Slides/PPT templates that are free to use) has brought us IconsMania. These icons are beautiful, editable, and free. Just like SlidesMania (which she created during the pandemic, designing slides that her elementary student would enjoy), these are built with educators in mind and the collections will continue to grow.
Simply go to IconsMania and search for what you need or browse the collections. While browsing you can limit the options to colorful, outline, or monochromatic. For example if I want icons to help communicate the schedule for the day, I can use the school icon collection.
If you select that you are a Google user, it will give you a template that will open in Google Slides. From there you can copy/paste them. If you wish, you can copy them into Google Drawings and save them individually as a PNG. Doing it this way makes it easy to resize or customize as you need. If you don’t want to customize them you can click “I just want the PNGs” will allow you to download a zip file containing all the icons.
Student Project Idea
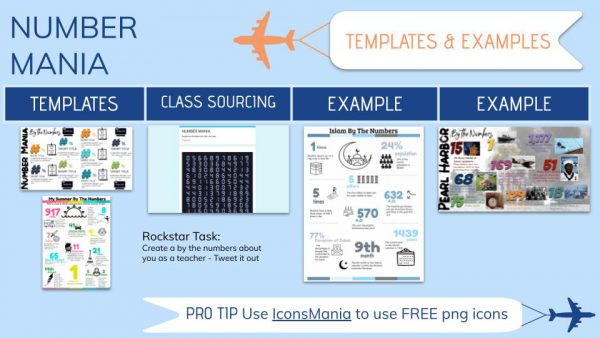
This can also be a great resource for student creation. One of my favorite possibilities is the Number Mania eduprotocol. In short, students fill out a Google Form with one fact about a topic. Then they look at a view only spreadsheet of facts collected by the class and design an infographic in Google slides. The Slides template can be pre-populated with relevant icons to streamline the creation process, eduprotocols are meant to be implemented in one class period. This a great way to build some background knowledge and interest around a new topic.
Slide made by Amanda Sandoval. Click it to view the templates and examples up close.
If you interested in trying this activity, reach out to Kaelyn Bullock by submitting a tech ticket and selecting “Technology Integration.” I’d love to help you plan this out for your grade level/content area.
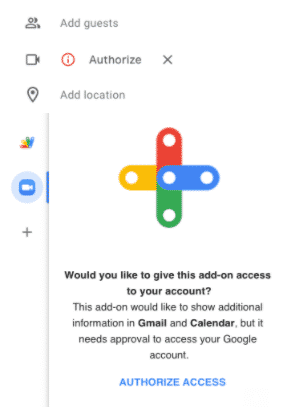
On Sunday, April 25th Zoom will be enabling new ZoomPhone features in the Zoom for GSuite Add-On that will prompt all staff users under our account to reauthorize Zoom for GSuite Add-On’s access. All Zoom for GSuite Add-On users will be prompted to reauthorize access to contacts and the company directory when attempting to schedule a Zoom meeting within Google Calendar; staff can also reauthorize in the Google Sidebar (see image below). Users will only need to reauthorize once. Because we are not a Zoom Phone customer, the add-on will not actually access our contacts or district directory, but reauthorization will nonetheless be required in order to continue using the add-on’s schedule meetings functionality.
If a user declines the reauthorization, the Zoom for GSuite Add-On will no longer be able to be used to schedule meetings.
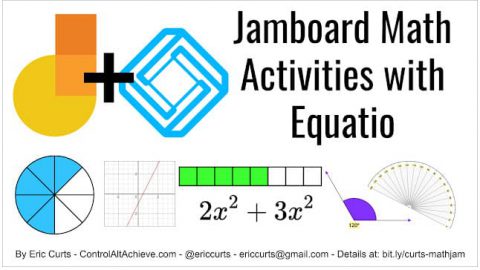
Many teachers have found Jamboard to be a flexible tool for students. However, it does not have a lot of tools for Math. Teachers can utilize the free-for-teachers Equatio extension to bring in many more math tools to enhance student learning. The Mathspace feature allows teachers to incorporate shapes for all levels of math from shapes to clocks, coins, and protractors. It also have some great Science shapes like pulleys, gear wheels, magnets and more. To learn more about how to add Equatio and use it in Jamboard, check out the post by Eric Curts.