Connecting Families to your LMS

One of the benefits to utilizing a Learning Management System (LMS) like Canvas or Seesaw is the ability for families to become observers and be involved in the digital aspect of the classroom.

Canvas Observer Accounts
Canvas Observer Icon

Canvas Observer Accounts are created from the main contacts listed in MiStar. In order for observers to access the account and follow their student(s), they need to change their password.

  1. Open a browser and navigate to https://pccsk12.instructure.com (opens in new tab).
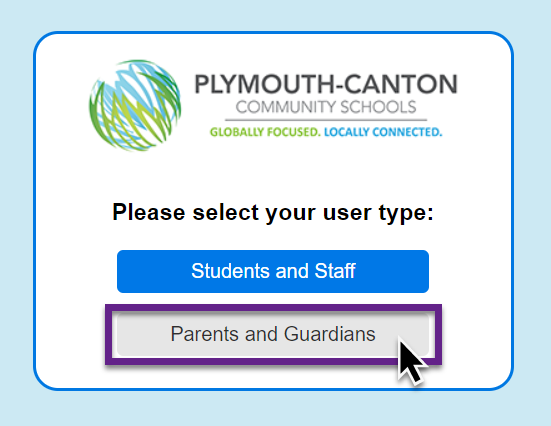
    • Click Parents and Guardians
    Canvas portal page showing the Parents and Guardians option

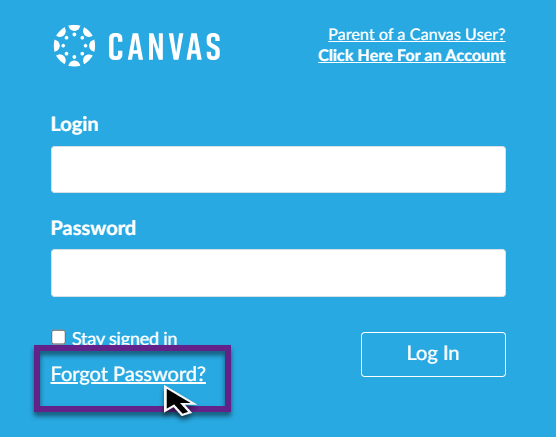
  1. Click Forgot Password.
    • Do this even if you haven’t already set up an account
    Canvas login screen highlighting the Forgot Password link

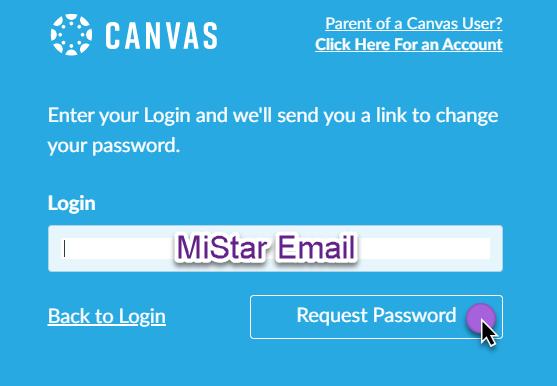
  1. Enter the email address that you use for MiStar Parent Connection.

  1. Click Request Password.
    Request Password button on the Canvas password recovery screen

  1. This will send a password reset link to your email (check your spam). Follow the instructions in that email to change your password and sign in.

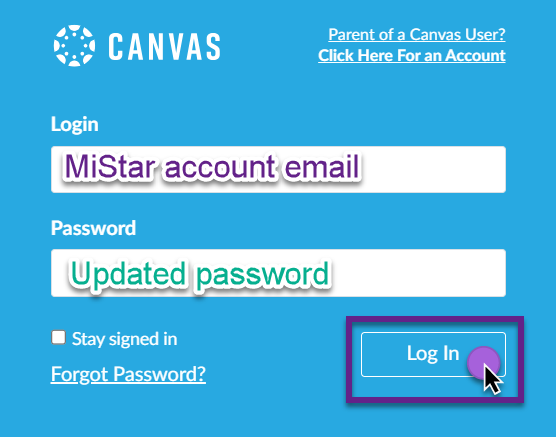
  1. Go back to https://pccsk12.instructure.com (opens in new tab), enter your email address in the Login box and enter your updated password to sign in.
    Canvas sign-in screen showing email and password input fields

Canvas Observer Account Setup Guide (Google Doc, opens in new tab)

Seesaw Family Accounts
Seesaw Logo

Families connect to their child’s Seesaw journal to participate in their student’s learning, see student work, and celebrate progress. They can connect to their child’s journal on the web (app.seesaw.me, opens in new tab) or by downloading the Seesaw App, available on iOS and Android. When families connect to their child’s journal, they can only see their individual child’s work, or group projects that their child is tagged in.

  1. Tap on the wrench to open Class Settings.
  2. Enable family access (if not already turned on) by sliding the toggle ON. (Family access is automatically set to OFF).
    Class Settings menu showing Family Access toggle button
  3. Go into the class you’d like to connect families to and tap + Families.
    Seesaw class interface highlighting the plus Families button

Teachers can generate an Invite Link to connect families to their students’ Seesaw journals.

  1. Tap on the wrench to open Class Settings.
  2. Select Invite Families. Tap Share an Invite Link.
    Invite Families option with Share an Invite Link button
  3. Copy and paste the URL that generates into your communication with family members.
    Generated invite URL link popup window
  4. This invite link will work for every student in the Seesaw Class. When pasting the link into their browser window, all the family member has to do is choose their student’s name from the list to connect to the journal.
  5. Once the family member chooses which student they’re trying to connect to and creates a Seesaw account, the teacher will receive a notification letting them know that they have a family invite pending.

The Ticketing Advantage

Our technology team is working hard behind the scenes to keep everything running smoothly. With a high volume of requests coming in right now, our top priority remains getting your classroom tech back on track as quickly and efficiently as possible.

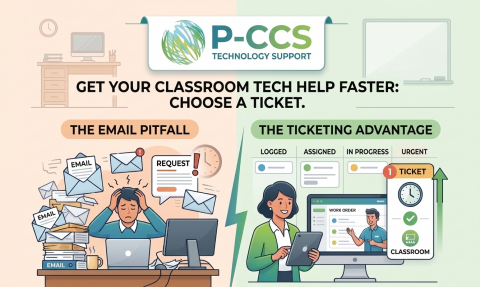
To help us serve you faster, please submit all tech issues through our ticketing system instead of sending direct emails.

When requests are sent via email, they run the risk of getting buried in a crowded inbox. Submitting a ticket ensures your request is logged instantly, assigned to the right team member, and prioritized—especially for urgent classroom needs. 

Submitting a request takes just a minute. Here is how to do it: 

  • Access the Portal: Open your browser, click on the P-CCS Bookmarks folder, and select Work Order Request. Sign in using Google SSO. 
  • Describe the Issue: Provide a brief summary of what is going wrong or what assistance you need.
  • Attach Visuals: Whenever possible, include a screenshot or photo of any error messages. Seeing the exact error helps us diagnose and fix the problem much faster.

Using the ticketing system guarantees nothing slips through the cracks and keeps our entire support process transparent and efficient. Thank you so much for your patience, partnership, and support as we work together to keep our school tech running seamlessly!

Prepping Your Canvas Course for the New School Year

Your Canvas courses should be visible and ready for action. Canvas is designed to simplify your teaching journey and provide you with a user-friendly platform to engage with your students, organize course materials, and foster a dynamic learning environment.

Course Template

To assist you in creating an engaging and effective online learning space, we’ve prepared comprehensive resources for the course template. These resources include step-by-step guides, video tutorials, and best practices for setting up your Canvas courses. Whether you’re a seasoned Canvas user or a first-timer, these tools will ensure that you’re making the most of Canvas’s features. Using the Canvas template ensure students and families have a more consistent experience in Canvas.
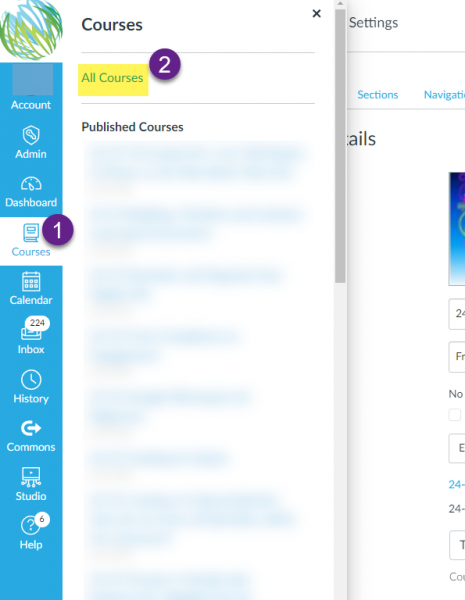
locate all courses

Locating Courses from Past Years

Looking for courses from previous years? Rest assured, they may not be on your dashboard, but they are still there. If you navigate to https://pccsk12.instructure.com/courses and scroll to the bottom of the page, you’ll see such courses under “Past Enrollments.” Past enrollments (such courses) are in read-only format. If you would like to make some edits and updates to your course(s) for current or future usage do the following. Click on the course under Past Enrollments, go to Settings on the Course Navigation Menu and click the “Copy this Course” button.
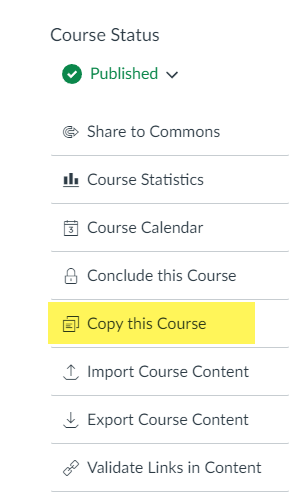
copy course option

Import Previous Content

You can easily copy previous Canvas courses into your 26-27 course shell. However, if you have been keeping the same content from year to year, some unused content might be slowing you down. Below, you will find steps to import Canvas content into your new course shell (once generated automatically through the MiStar integration).

Getting Started with Canvas

Just getting started with Canvas or wanting to start anew? Check out this Canvas Quick Start Guide.  It has links to crosslisting directions, template homepage information, button templates, and more!

Crosslisting Guide

When you have taken time to update the homepage and import previous content, you might not want to repeat those steps for multiple sections on the same course. If that is the case, take a look at the crosslisting guide. This will allow you to only update one course and the changes will be reflected in all sections.

Publish Your Course(s)

You must publish your course in order for it to be visible for students and families. Rest assured, students cannot view course content until the term starts (check this under the course settings). Avoid unnecessary emails from students and families and set yourself a reminder to publish!

If you need assistance with any of these steps, please submit a tech ticket.

Technology Essentials: Streamline Your Workflow

As your new Educational Technology Manager, I am thrilled to dive in and support our incredible district team. Whether you are stepping into a P-CCS building for day one or year twenty, technology should streamline your workflow, not complicate it. While our P-CCS Technology Essentials guide is often shared during new hire onboarding, it serves as a valuable annual cheat sheet for every staff member to keep systems running smoothly.

Chrome Navigation Reminders

  • Make sure you are signed into the Chrome browser with your P-CCS Google ID
    1. On your computer, open Chrome.
    2. At the top right, select Profile Profile and then Add Chrome profile .
    3. If you choose to sign in to Chrome with your Google Account, your profile name will automatically be your Account name.
    4. Choose a name, photo, and color scheme.

If you choose to sign in to Chrome with your Google Account in this new profile, you’ll be able to save your bookmarks, passwords, and other settings in your account and access them on your other devices where you’re signed in.

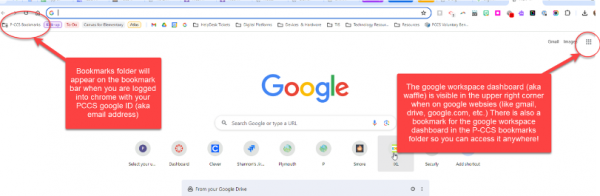
  • P-CCS Bookmarks appear on the Bookmark Bar when logged into Chrome with your P-CCS Google ID.
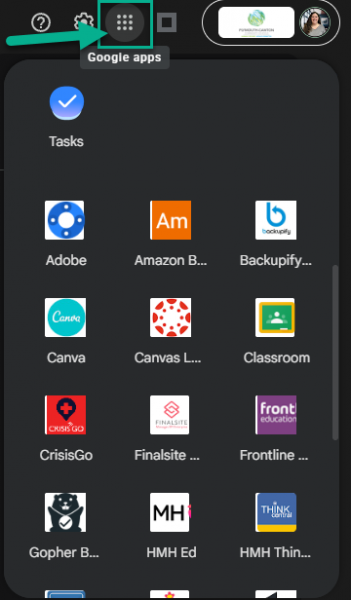
  • The Google Waffle is visible when on google websites (gmail, drive, docs, ect.). It can also be found in the P-CCS Bookmarks folder under Google Workspace.

SMARTboard Updates & Tips

Check out the Smart Learning Academy to level up your knowledge of your SMARTboard and Lumio. The Academy is filled with short self-paced courses that walk you through using various tools and let you interact with a SMARTboard simulation from anywhere.

Tips

  1. Use the Lock Canvas button when using the Whiteboard Lock Canvas Button. This makes it so the background won’t automatically get moved when content and annotations are added.
  2. Want to write with 2 different colors? Enable finger inking while using the Whiteboard. Select 1 color for the pen and 1 for finger inking. Finger Inking Icon

Technology Support

How do I get help?

  • Submit a work order to get support with malfunctioning or broken technology and get questions answered on how to use district resources. 
  • Master Library is the work order system for technology, facilities, & operations. Access it via the P-CCS bookmarks folder.  Sign in with your District Google ID.