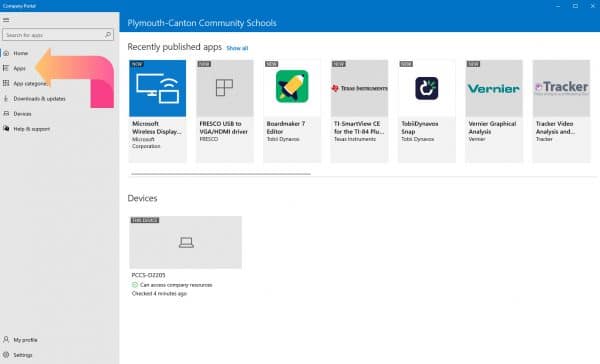
[How-To] Connect to the P-CCS Wi-Fi Network

For STAFF

If you have a personal device and would like to connect it to a district wireless network, please connect it to the PCCSK12-Staff network using your network account credentials. Your network account is the same one used to login to any district desktop or laptop (not Google/Chromebooks). If you do not remember your account information, please submit a tech request.

Disclaimers

  • District Chromebooks will automatically connect to the PCCSK12-Devices network.
  • Devices such as AppleTV and Chromecast will need to be authorized by the tech department first. Please fill out this form if you would like to have one connected.
  • Home and  personal assistant devices such as Google Home/Nest (Google Assistant), Amazon Echo (Alexa), and Apple HomePod (Siri) are not allowed on the district network. Personal assistant services built into personal smartphones are unaffected.
  • In most areas we only offer a 5 GHz WiFi network. If your device only supports 2.4 GHz you will not be able to connect.

For STUDENTS (BYOD)

If you have a personal device and would like to connect it to a district wireless network, please connect it to the PCCSK12-Students network. When prompted for a username and password, use your network logon credentials (username without @pccsk12.com at the end) to connect. Please note that student usernames and passwords will not work on the PCCSK12-Staff network or any other network.

Disclaimers

  • In most areas we only offer a 5 GHz WiFi network. If your device only supports 2.4 GHz you will not be able to connect.

Please see the following device-specific guides for connecting to the network.

If you have a personal device and would like to connect it to a district wireless network, please connect it to the PCCSK12-Students network. When prompted for a username and password, use your network logon credentials (username without @pccsk12.com at the end) to connect. Please note that student usernames and passwords will not work on the PCCSK12-Staff network or any other network.

Instructions for Chrome OS (Chromebooks)

Click on your picture icon in the bottom right-hand corner

chromebook-wi-fi-directions-pccsk12-students-network

Click on your current WiFi Connection to bring up the list of available network then select PCCSK12-Students if you are a student, and PCCSK12-Staff if you are a district staff member.

Fill in the following fields as seen in the screenshot to the left. Make sure to use your username (P-CCS Google email address for students, network account for staff) in the “Identity” field

  • EAP Method: PEAP
  • Phase 2 authentication: Automatic
  • Server CA certificate: Do not check
  • Identity: (Your username)
  • Password: (Your Password)

Push Connect when finished

Instructions for iPadOS and iOS (iPad and iPhone)

Find the Settings App on your device and open it.

Tap on Wi-Fi, and then tap on the PCCSK12-Students if you are a student, and PCCSK12-Staff if you are a district staff member in the list of Wi-Fi networks

When prompted for a username and password, use your network logon credentials (username without @pccsk12.com at the end for students, network account for staff) to connect.

*Example:
Username: izcough872
Password: learnpow

Tap the Trust button when you see this window

You should see a check mark in the Wi-Fi list at the top that confirms you are connected.

Instructions for Android devices

Find the Settings App on your Android device then Tap on Network & Settings or on Wi-Fi. (The layout of the settings may differ with different types of Android devices)

Tap on the PCCSK12-Students if you are a student, and PCCSK12-Staff if you are a district staff member in the list of Wi-Fi networks. Use the following settings:

  • EAP Method: PEAP
  • Phase 2 authentication: None orMSCHAPV2
  • CA certificate: Do Not Validate or Trust on First Use
  • Domain: PCCSK12.com
  • Identity: (same as laptop login username)
  • Anonymous identity: leave blank
  • Password: (current laptop login password)

Instructions for Windows 10

Look for WiFi icon in the bottom right-hand corner of your desktop either by clicking directly on it, or looking for it with the up arrow icon.

Click WiFi Icon in system tray then click on the PCCSK12-Students if you are a student, and PCCSK12-Staff if you are a district staff member.

Click the Connect button

Fill in the following fields as seen in the screenshot to the left. Make sure to use your username (PCCS Google email address without the @pccsk12.com for students, network account for staff) in the top field and your password in the bottom field

Example Username: izcough875
Password: (Your password)
Click OK when finished

Instructions for macOS

Select the Wi-Fi Symbol in the Menu Bar.

Then choose PCCSK12-Students if you are a student, and PCCSK12-Staff if you are a district staff member.

Enter username and password, (same as your Google login without the @pccsk12.com for students, network account for staff) and select “Remember this network”

Choose the Continue button

If prompted, enter your personal Mac’s Username and Password and Select “Update Settings”

Illuminate DNA Updates – Item Banks

Illuminate DnA has recently made some updates making item banks even more useful to you! Explore this slidedeck to see the updates:

If you’re unfamiliar – Illuminate DnA is an Online Achievement System built on Assessments, Data and Learning Tools, as well as Special Education Systems. Staff access illuminate by logging into MistarQ and clicking on Menu >Analysis >Mistar-DnA. Through Illuminate DnA staff can enter test scores, pull questions from item banks to create assessments, and use the data inside Illuminate to monitor student progress. Need more help with Illuminate DnA? Check out these resources from Jonathan Flukes, Dir. Of Data, Assess. Research & Evals.

How To Install Apps on New Dell Laptops

As of now, all instructional staff working with K-12 students should have been issued a new Dell Latitude 3520 laptop, with the exception of a few make-ups that have yet to be deployed. We appreciate everyone’s patience and want to thank staff for being cooperative, given our expedited time frame to issue all devices in the district. Even we are adjusting to the new technology and all the changes involved with the new Dell laptops. Besides the differences in the look and feel of staff laptops, one of the biggest changes is the addition of the Microsoft Company Portal.

Intune Company Portal - Apps on Google Play

What is the Company Portal?

The Company Portal is part of a new data management system that allows PCCS staff to securely download and install district-vetted programs and updates. The Company Portal can be thought of as an App Store for PCCS, including all apps and utilities used in-district. We surveyed the list of programs that were being used by teachers and staff members in the district and included the vast majority of these in the current app list in the Company Portal. The list of available apps in the portal is ever-growing,

You may have noticed that installing programs outside of the Company Portal prompts for an administrator username and password. This is completely to be expected and is designed to protect your laptop and files safe from malware or malicious programs. Safeguarding devices connected to our network protects our infrastructure and makes our districts less susceptible to cyber attacks. It’s also something our insurance company has begun to insist on for us to remain with coverage.

How do I install the Company Portal on my computer?

The Company Portal should install on your laptop after about an hour of initial use. Once you log into your laptop for the first time, it gets pushed out to your device and usually takes about that long to appear. Once installed, and following another restart, a shortcut to the Company Portal should later appear on your desktop. If you do not see an icon for Company Portal, it’s possible that it hasn’t been pushed to your device yet. A restart often helps, but it is also possible that you can find the Company Portal by searching for it.

If you click the Start button and begin to search for “company portal”, you should see the app populate in the search results. Once the program opens, feel free to right-click the icon at the bottom of the screen and select Pin to taskbar so it is readily accessible when you want to open the Company Portal in the future.

Once the Company Portal opens, click Apps to see a full list of all available apps in the Company Portal.

How do I install the apps I need?

Click the app you’d like to install and click Install. Please do not disconnect from the Internet or close the lid during the installation process. Some apps are larger than others and require more time to download and properly install.

You will know an app is completely installed when you see the blue checkmark and Installed at the top of the screen.

Should I install everything in the Company Portal?

There is no need to install all available apps in the Company Portal. If you have a specific software need, there is likely an app added to the library to meet that need. See the table below for some examples.

To use: Install these apps:
Smart Notebook software SMART Education Software

SMART Product Drivers

Microsoft Office Microsoft 365 Apps for Windows 10

Please note, if it is a paid app or subscription service (and some of them are), and you don’t have the license for it, you won’t be able to run it even if you do install it.


There is software I would like to use and it’s not available in the Company Portal. How can I install it?

If there is software you’d like to use and it provides educational value, you can request to have it added into the Company Portal. Please click here to submit a tech request and choose Computer Software Request. We will gladly evaluate the request and add it to the Company Portal if it is something Teaching and Learning and/or the Technology Department deem educationally valuable for staff members.


I still don’t see the Company Portal on my laptop. What do I do?

If you don’t see the Company Portal, even after searching for it, it may be due to a setting tied to your logon profile. Please submit a tech request and let us know so we can look into it!


Have any questions?

If you have any questions about how the Company Portal works or need help setting up any apps, please submit a tech request and a member of our department would be happy to help you.

Meet OrbitNote (formerly the Texthelp PDF Reader tool)

The TextHelp PDF Reader has officially been reborn as OrbitNote!

Earlier this summer, the Texthelp PDF Reader was updated and became OrbitNote. This update included a new look & easier onboarding. P-CCS students & staff have access to all the PREMIUM features of OrbitNote detailed below.

If you’re not familiar with it yet, OrbitNote allows staff & students to transform and interact with PDFs and digital documents in a completely different way. It helps to create an accessible, dynamic and collaborative space that works for everyone.

You & your students can use OrbitNote to:

      • -Collaborate in real-time within digital documents
      • -Read text, including math & science equations, aloud with easy-to-follow dual color highlighting
      • -Type text on top of your PDFs with the Text feature
      • -Highlight and extract information with colored highlighters
      • -Add text and voice comments or use pushpins for helpful hints or instructions
      • -Use freehand or shape drawing to scribble and draw on your digital documents
    And more!

There is NO ACTION required for students or staff who were already using the PDF Reader; the new OrbitNote extension auto-updated. Students and staff may have to update permissions with the first use of the new tool.

Staff who have not used the Texthelp PDF Reader in the past will need to install the extension here.

For more information about using OrbitNote, including Canvas LMS integration, go to the RW4G@PCCS website: https://bit.ly/PCCS-OrbitNote

The new OrbitNote Quick Reference Guide is available here.

Videos: https://text.help/orbitvids
Technical Support: https://support.texthelp.com

You might also want to check out this video of OrbitNotes used in Canvas and/or a comprehensive overview of many of TextHelp’s features:


OrbitDoc (now OrbitNotes) used in Canvas


Second Notice: End of the Year Canvas Support-Action Required

Make a copy of your Canvas course

*PLEASE NOTE: In early August, ALL MISTAR created courses will un-sync and therefore courses will be deleted off of dashboards. Please make sure you follow the directions below to ensure all work (assignments, discussions, videos, etc.) will save correctly.

With Canvas being utilized for the foreseeable future, and with the end of the year approaching, we wanted to pass along some directions on how to ensure that your course(s) and work created this year can be used for next Fall.  The directions below will enable you to copy your course into a “Sandbox” type course, so when you return in the Fall, all you will need to do is import your “Sandbox” course, into your MISTAR rostered course.

Watch the less than 3-minute video below or watch it on YouTube. https://youtu.be/ibyFUeqSurY


Printable PDF directions

Optional, further back up step: For Directions on saving your course to your computer/google drive click here

End of the Year Canvas Support – Action Required

Make a copy of your Canvas course

*PLEASE NOTE: In early August, ALL MISTAR created courses will un-sync and therefore courses will be deleted off of dashboards. Please make sure you follow the directions below to ensure all work (assignments, discussions, videos, etc.) will save correctly.

With Canvas being utilized for the foreseeable future, and with the end of the year approaching, we wanted to pass along some directions on how to ensure that your course(s) and work created this year can be used for next Fall.  The directions below will enable you to copy your course into a “Sandbox” type course, so when you return in the Fall, all you will need to do is import your “Sandbox” course, into your MISTAR rostered course.

Watch the less than 3-minute video below or watch it on YouTube. https://youtu.be/ibyFUeqSurY


Printable PDF directions

Optional, further back up step: For Directions on saving your course to your computer/google drive click here

Visual Thinking with GitMind

Image of outline and mind map

GitMind is a great, free tool for mind maps and brainstorming. You can easily sign-up with your Google account.  There are several templates ready for use and they have a category for education. Below is a video overview.

There are no ads on the page. The only “paywall” I can find is the ability to export in other formats, which you can do with “points” you earn by using the platform. You can easily share work with a link and you can add collaborators.

Ideas for Classroom Use

If you teach younger students you might not have them create their own, but you can work as a class. There are templates for the elements of a story and working with words.

Older students could create their own, there a templates for timelines and essay structures. At the year’s end students could create a mind map to review material from the entire course. You can also edit your mind map by editing or importing an outline and the program will add it to your mind map.

Image of outline and mind map

Managing Your Modules

Anyone with a year-long course (or 100+ modules), might be noticing that is takes quite a long time for all your modules to load. Students and families may also be experiencing this lag when they click the link for their daily work module. To help save time and frustration we recommend that you free up some space in one of two ways:

  1. Unpublish modules from early in the school year. Image of "unpublish" icon
  2. If you or your students are still experiencing a slow down, you can copy the module to your Sandbox course and then delete it from your main course.

Image of steps to copy and delete modules

Semester 2 and Quarter 3 Courses Published in Canvas

Publishing of Canvas Courses

To assist teachers, Canvas automatically published all Semester 2 and Quarter 3 courses automatically generated through the MISTAR/Canvas sync

Please note the following:

  • Students only have access to Published courses. If you have any courses that you do not want students to see, please be sure to Unpublish those courses. (see below) If a course is Unpublished they will not see it on their dashboard. To Unpublish a course, go to the course you don’t want students to access and select Unpublish at the top-right part of the screen. You cannot unpublish a course after you assign something to a student.
  • Manually created courses were not automatically published. If you would like to publish any of your manually created courses, please follow these instructions.

Reminder: Customizing Your Canvas Dashboard

To customize the teacher or student dashboard to show certain courses please see the graphic below:

Dashboard