
Your Canvas courses should be visible and ready for action. Canvas is designed to simplify your teaching journey and provide you with a user-friendly platform to engage with your students, organize course materials, and foster a dynamic learning environment.
Course Template
To assist you in creating an engaging and effective online learning space, we’ve prepared comprehensive resources for the course template. These resources include step-by-step guides, video tutorials, and best practices for setting up your Canvas courses. Whether you’re a seasoned Canvas user or a first-timer, these tools will ensure that you’re making the most of Canvas’s features. Using the Canvas template ensure students and families have a more consistent experience in Canvas.
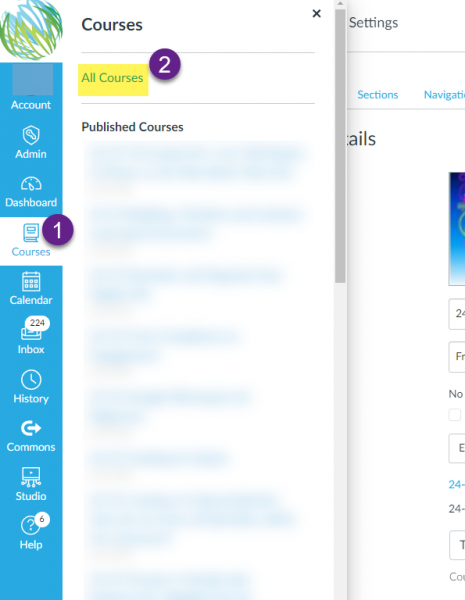
Locating Courses from Past Years
Looking for courses from previous years? Rest assured, they may not be on your dashboard, but they are still there. If you navigate to https://pccsk12.instructure.com/courses and scroll to the bottom of the page, you’ll see such courses under “Past Enrollments.” Past enrollments (such courses) are in read-only format. If you would like to make some edits and updates to your course(s) for current or future usage do the following. Click on the course under Past Enrollments, go to Settings on the Course Navigation Menu and click the “Copy this Course” button.
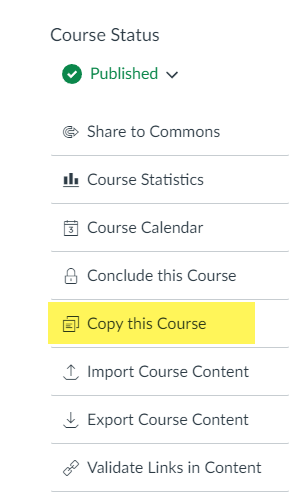
Import Previous Content
You can easily copy previous Canvas courses into your 26-27 course shell. However, if you have been keeping the same content from year to year, some unused content might be slowing you down. Below, you will find steps to import Canvas content into your new course shell (once generated automatically through the MiStar integration).
Getting Started with Canvas
Just getting started with Canvas or wanting to start anew? Check out this Canvas Quick Start Guide. It has links to crosslisting directions, template homepage information, button templates, and more!
Crosslisting Guide
When you have taken time to update the homepage and import previous content, you might not want to repeat those steps for multiple sections on the same course. If that is the case, take a look at the crosslisting guide. This will allow you to only update one course and the changes will be reflected in all sections.
Publish Your Course(s)
You must publish your course in order for it to be visible for students and families. Rest assured, students cannot view course content until the term starts (check this under the course settings). Avoid unnecessary emails from students and families and set yourself a reminder to publish!
If you need assistance with any of these steps, please submit a tech ticket.

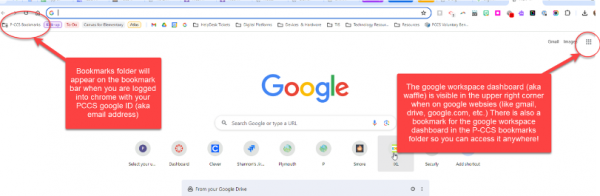
 Add Chrome profile
  .
.
 . This makes it so the background won’t automatically get moved when content and annotations are added.