Our email inboxes can become quite difficult to manage, creating a filter is a great way to clear the clutter without removing important messages that we may need to access later. For example, you may get LMS notifications that you want to filter to a specific place. Follow these steps to help your inbox manage itself using filter rules.
Suppose you get Exit Ticket response emails. You want to move them all to one folder (Gmail calls them labels) to view all at one time.

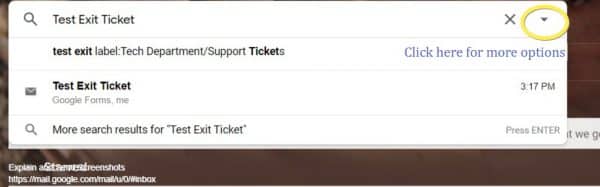
It is best to identify the sender and/or subject of these emails to type into the Search bar. You’ll do an advanced search, so click the drop-down arrow.
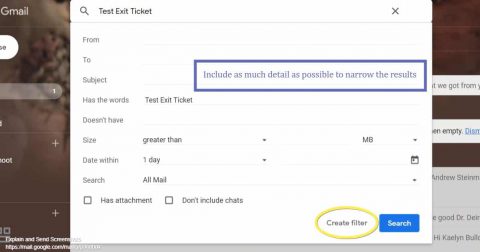
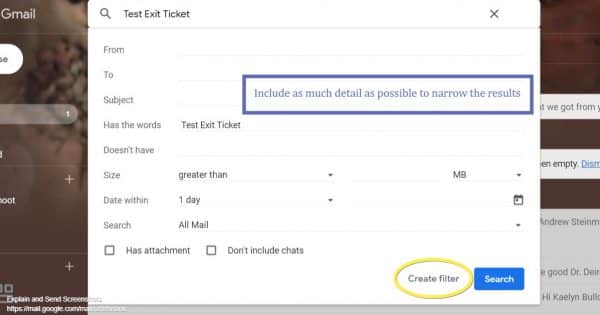
Add as much information as possible to ensure you get the right messages filtered. Then click, “Create Filter.”
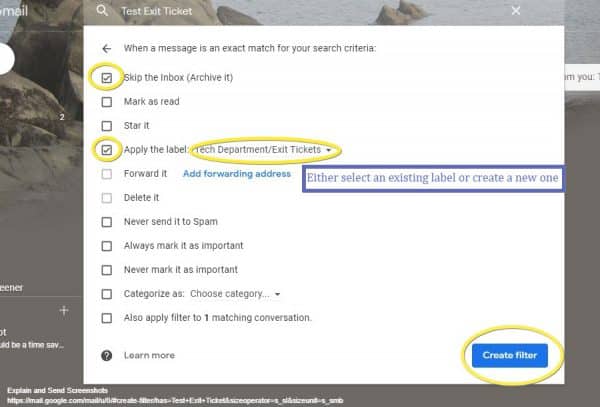
Select any filter rules you see as appropriate for that kind of message. You should apply the appropriate Label (or Create one). You may also want to select “Skip the Inbox.” If the case, rest assured, archived emails in Gmail are not deleted permanently after 30 days. They are permanently stored in your email (and now labelled) until you delete/trash it.
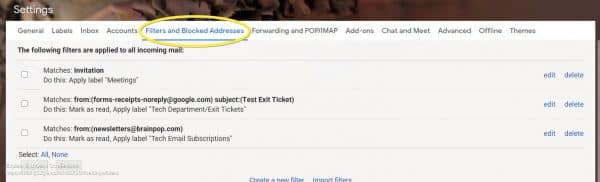
 You can always remove or edit your filter in Setting by clicking on the wrench icon in the upper-right corner.
When you are ready to view the filtered emails, access the Label on the left-side menu.
